Wrapping Surly Moloko bars.

I’ve wrapped a few of these, and usually with difficult tape. Using a traditional “cork” tape would probably be a lot easier. My approach has been to try and not have any visible tape, so I start at the inside and wrap out, then use some tape to hold the loose end, and probably add a little “cheater” square or two. The main wrap starts from behind the brake lever and you then finish it off at the top with a bar-plug like you do on drop-bars.

Tobias Feltus:
Share

Crashing my third helmet: the Kali Tava

I’m guessing not too many people write about their experience of crashing with a helmet to the manufacturer. Crashing is not a pleasurable experience, but it is interesting to find interesting details within a crash.

A couple of months ago I was wondering if an aero helmet would be cooler than wearing a cap under a vented helmet. Kali helmets come with a lifetime crash replacement warranty on their cycling helmets, which is a fantastic selling point. I chose the Tava due to its lack of venting on the top, and found my theory to not be wrong, the helmet breathes pretty well. Aero helmets do look a bit weird, but the Boa closure system and shell fit my head well. Unlike other helmets I’ve worn, this helmet sits in a single position, and I can’t adjust its angle on my head.

Last sunday, on my way to work at Rage Cycles (Scottsdale, AZ) on the cross-cut canal path, I pushed too hard coming out of the tunnel under McDowell (despite the path being dry and clean in the apex) and hit the concrete really hard. I have road rash on the top of my shoulder, couple of scrapes on my elbow and bike, but thankfully my head is fine.

I’d just been thinking about how I hate crashing, and how thankfully I’d not crashed in a long time.

Since it had rained heavily the night before, the tunnel was full of mud, but as I entered it I could see the exit was dry and clean. I was momentarily confused right before this point as the path had some interruptions due to an Xterra event which was not signposted. It always irritates me that events use the path I commute on every day, without giving forewarning. As I reached the end of the tunnel I got out of the saddle, and the front wheel continued in a straight line, whilst I turned up to the right. I was probably moving at around 14mph, though Strava tells me I was at 23mph just before entering the tunnel. Judging by the road rash on my shoulder, I think most of the impact was directly to the side of my head. And yes, you do get the gift of greater detail in memory, as the whole event probably lasted around 1/10th of a second, but within that I was able to feel the sensation of the helmet feeling loose and rotating on my head as I looked down at the bike sliding away from me. I got up, moved my arm to make sure I’d not broken anything, and got back on the bike as I was in a blind corner.

Without the helmet I’d have been concussed, since I lost the front wheel at a reasonable speed. The Tava is a top-tier helmet and uses all of Kali’s tech, including carbon nanotubes and the marriage of different densities of foam in the shell, keeping structural integrity separate from deceleration and crumple zones (Composite Fusion and Nano Fusion). Furthermore, they have their Low Density Layer (LDL) liner in the helmet which is Kali’s version of MIPS: these innovations in helmet design help reduce the rotational inertia caused by your head (in movement) coming in contact with a static obstacle, permitting the helmet to rotate without jerking your brain with it. MIPS looks like a cradle that is attached to the helmet with little rubber bands, the LDL looks like octopus tentacle suckers made of rubber. The LDL made it feel as though the helmet was on loose, as I felt it slide towards my left ear – though in reality I would imagine that I moved and the helmet stayed in place on the ground. The right side of the helmet is flattened. The only discomfort to my head was what felt like my hair (the little I have) was pulled a little, so the skin felt mildly tender. This lasted about 3 days.

This is the third helmet I’ve crashed in my life. Twice have been due to the loss of traction with the front wheel, and all three would probably have lead to hospitalization without a helmet. I forget that I am a helmet advocate for this reason.

Tobias Feltus:
Share

Broken components and out-of-the-box alternatives (part 6)

Three weeks ago I remembered that my erratic shifting might be due to the fact that I was using Tacx jockey wheels. In a previous attempt to eliminate noise I had changed jockeys. It is a strange anomaly that all aftermarket jockey wheels use cartridge bearings, and none that I have seen have a floating guide wheel which Shimano derailleurs do need. So I put the XT jockeys back in the cage and shifting returned to smooth precision.

Two weeks ago I sprinted to get through a short green light, and after that I could not shift past half the cassette. The b-spring broke, cementing the fact that my modification was not a viable solution. It lasted around 1400 km (granted, it was an old and second-hand derailleur).

I promptly ordered a Tiagra 4600 SS derailleur and a Wolftooth Road Link, as this combination is (according to Wolftooth) going to work out of the box. Assembly took a whole 5 minutes, including shortening the chain to Shimano/Sheldon Brown’s 2 full link overlap sizing. Contrary to Wolftooth’s directions I was forced to screw the b-tension screw in fully, else the chain would have no tension on it in smaller sprockets. Also, after dropping the chain a couple of times, I had to adjust the derailleur’s a-pivot to the tighter setting.

The Road Link does what it says it will do, however shifting is not perfect. I think this is a better solution to modifying a derailleur, however it is still not as robust as a native wide-range 1x drivetrain. I am looking forward to trying SRAM with a similar setup.

Wolftooth Road Link

Tobias Feltus:
Share

Moulton Tour d’Ecosse 2013

2013 was a different time. I had only really been into bikes for a few months, and yet somehow this unfolded. The text was published in The Moultoneer (I forget which issue), attached with pictures below.


The Moulton – Grand – Tour D’Ecosse


To be perfectly honest, I have no idea how we got here.


I had been a designer & photographer, never really been into any kind of sport and I had a bicycle. It was an Ikea bike which I had modified, somewhat. Lauren is a musician and academic: she was away in Austria at a conference, and had planned a treasure hunt for Valentine’s which pushed me to ride the ‘Blue Donkey’ out of town, my first ride on Strava and probably three times the distance I’d ever done, at 35 km.


I liked it. I felt accomplished.


A couple of months later, I had an odd-shaped bit of metal in the flat: Lauren thought it was a dog. Paul had shown me something and I had settled on Moulton being the apex of small-wheeled cycling – something I understood as the Donkey had 20” wheels. Somehow, it was decided that we would do a cycling tour – circumnavigating the coastline of Scotland on Moultons – as soon as Lauren had handed in her PhD thesis.


The build was difficult. I had never built a bike, and planned some major modifications to the Deluxe and Mini frames which we had acquired. Brian Perkins was incredibly helpful with the Mini and a couple of other parts. I took it upon myself to fabricate carbon fibre racks, Lauren was building the luggage, and the bikes had been rebuilt with 8 speed derailleur gears. We had a few days of false starts (mechanical) but finally…


Day 1: Friday 13th September, 2013


By the time we made it to the foot of the Forth road bridge, we had almost settled into the fact that we were finally off. We stopped at the Three Bridges Cafe for a bacon roll and a coffee. The owner chatted to us about how he sees a lot of cyclists, and how he had once done a long tour, but had contracted Lyme disease which had impacted his health greatly…


Cycling a mile over water – reaching the top and knowing we were finally out of Edinburgh’s reach, and entering Fife. What a moment! We reached Callendar near dusk. We’d done it! We’d started our tour. We’d covered 91 km: the first time either of us had ridden a Moulton; the first time either of us had ridden with luggage; and the longest distance either of us had ever ridden.


Day 2


Despite the distance covered, we were not too badly fatigued when we woke. First night sleeping on the 10mm roll-mats, and we weren’t even too cold in our £21 double sleeping bag and tenner’s worth of silk liner. Packing, however, took us a while. It was our first start with a wet tent, so we didn’t get on the road before 11. The sun was out, and our objective was to make it well onto NCN Route 7.


We bought food in Strathyre, at THE shop. It was my first experience of the peculiar nature of a THE shop, as in a one-shop that sells everything, or sells everything that can be bought in the town and is also the Post Office, but really sells not very much, as they have one broccolus, one pack of chicken breast, and a couple other odds and ends in a fridge.


Route 7 near Loch Earn is magic, running through the Glen Ogle estate on the bed of the late Callander and Oban Railway line. We camped by the side of the path, where we barbecued our chicken breast before bedding.


Day 3


We woke wet. Our disorganised unpacking meant that we had bags stuffed in all corners of the tent, making contact between the rain-sheet and the inner tent, so rain was dripping on us. Later on we had our first mishap on the ride, as one of the three bolts holding on Lauren’s front rack disappeared. We noticed and I replaced it opposite the Killin Gun Club, which I thought was hilarious.


My feet were frozen. I was having trouble stopping, as I couldn’t feel the ground when I put my feet down. Standard SPD shoes and neoprene overshoes were not even vaguely waterproof, and hardly warm either. We decided that we needed to address the issue and go shopping in Fort William. We caught a train at Tyndrum, arriving at Lauren’s parents’ in Banavie just after dark.


Two days later, we set off. I had bought Shimano MW81 boots, and Lauren had acquired Gore-Tex socks. We lunched at Glenfinnan, and must have looked rather amusing to the throngs of Japanese tourists who were scrambling around in mud to look out from observation platforms above us. The next day we crossed from Mallaig to Skye. On the 20th we traversed Skye: looking at the map this was a wonderfully epic day. We lunched mid-afternoon at Saucy Mary’s amongst the first (motor) bikers there for the big rally. Just after we’d got off the Skye bridge, Pete drove past us at the very moment that he was telling his tour about his silly friends who were touring the highlands on tiny bikes, to the point that he just was able to add “… and there they are!”. We camped next to a war memorial on the coast.


The next day started with heavy pushes uphill, followed by incredibly long and EPIC downhill runs reaching what seemed a million MPH! We stopped for lunch on Loch Carron. My rear rack had started to wobble, so we went to Lochcarron to the amazing Spar shop, and got some gardening wire to brace it with. We camped in the enchanted forest of Achnashellach Lodge.


Day 10: Hell of the North followed by Paradise.


Yes, we started on a trail that Google had suggested as cyclable, and then followed what was sign posted as a Forestry Commission diversion, putting us on the old pony trail which involved a couple of hours carrying our 30+kg bikes up a muddy bank which was barely hikable. The struggle reminded me of old footage of 1930s cyclocross races. More recently a friend was telling me about this most amazing mountain bike loop he’d done up north – “Oh right” being the answer to my comment that we’d done it on the Moultons.


Once we got over onto the Coulin pass, however, it was bliss. We were atop an endless glen with no civilisation in site, slowly negotiating a rocky estate trail on heavily laden bikes with tiny wheels. We found a loch, and pitched tent. We declared it paradise. Lauren read and I had an unsuccessful attempt at fishing.


We had a day of rest in Paradise. Woken by the chomping of two white horses eating grass near our tent. We spoke to the head stalker and found that the Coulin estate belongs to W. H. Smith.


We pushed on, covering many a mile through stunning landscapes and the beautiful road flanking Loch Maree. Later in the day we struggled to find any flat ground, which probably forced us on 15 miles more than we would have liked. We were on Loch Ewe, a rather important naval hideout in WWII. The only place we found to pitch ended up being near Aultbea in one of the many old Anti Aircraft batteries. And of course as we were scouting the best place to pitch, we found a hatchet and machete on the ground. We had an uncomfortable night.


I happened to be wearing my team Coast bibs when we rode through First Coast and Second Coast. I can’t say they were towns, but they were signposted.


Day 14


Atop the Dundonnell estate (which belongs to Tim Rice), we were faced with stunning glens and rather unusual lochs, seemingly stacked like staircases, when you felt that water should only be at sea level.


We made it Ullapool Post Office at around 3, where we collected our package of spare spokes sent up by Dylan at Yourspokes, and a great gift/saviour pack from Jamie at Koo Bikes. We stayed at the Ardmair campsite. The owner gave us a lift with the Moultons in his pickup into Ullapool so we had a wonderful opulence of oyster at The Seaforth, with a lovely pint of local ale.


The following day we crossed the border into Sutherland, saw our first sign for John o’Groats and saw a woman burning a heap of wool in Elphin, which made us feel as though we had entered Wickerman territory (and to be honest, we were not even geographically far from Summer Isles). We camped near prehistoric caves and a place where fish spawn is fertilised and sheep are dipped. Lauren enjoyed the chatter of stags, as their season of rutting had just begun.


We cycled against a big road race. As we pushed, almost each and every racer waved and smiled. We had soup and a sandwich at the Maryck tea room, near Unapool, which was pretty magical with its doll museum on a landscape that looked more like Hawaii than anything I was familiar with. We had dinner at the Scourie Hotel, both eating venison in vengeance for the loss of sleep due to rutting.


We passed a place called Badcall. We didn’t stop there. We stopped for lunch at the London grocers, which was closed but we used their picnic bench. We pressed on to Kinlochbervie, had coffee at the hotel and purchased a fishing license for the following day. We made it to Sandwood Bay for an amazing sunset.


Riding to Sandwood is possible, but I guess it is not ideal when you have a lot of luggage. About half the trail is relatively smooth, then it gets pretty hard going as there are a lot of large stones to keep the path from eroding.


The landscape here is insane. One of the most remote pieces of coastline in Europe, and clearly a geological mishap. There are small lochs in the middle of bog, which have sandy beaches at about 100m altitude, with a sheer cliff to the ocean. The beach itself then has a view of the huge sea stack which – of course – was framing the setting sun as we arrived.


Day 18: Monday 30th September, 2013


A windy awakening. Another flawlessly sunny morning, we walked to the nearest stream to get water: Sandwood was the first place on the entire trip where we struggled to find drinking water, and this stream was a good 20 minute walk from our camp. We had breakfast on a micro-loch beach. We finally got our wetsuits, Kindle and fishing gear and headed to beach. Windy, and sand stormy. Finally went in the water. Lauren thought we were in the water a bit too long, as I stalled the retreat, my reasoning being that I thought it was a good idea to bring up the fact that I thought it would be a good idea if we got married, seeing that we had – at this point – been in the most extreme form of company/isolation that either of us had ever experienced, and still liked each other. Gleefully, Lauren agreed, surrounded by waves and tiny surface rainbows, bright sun and, yea, freezing water. After all, this is the North Atlantic. We were facing towards Canada, and regions that are relatively uninhabited. Though the wetsuits kept us warm, they were short-sleeved, and both of us were starting to realise our hands were stiffening up. We headed back out to Sandwood Loch, tried fishing and reading. The reading was successful, but the fishing proved less so. Having not really planned ahead, I used a small red zip-tie to fashion an engagement ring of sorts. Lauren now wears a palladium cast of the zip-tie which bears a small diamond, bezel mounted where the ratchet was in the plastic original. Magpie Jared did a stunning job of making this a reality, and the ring still has “CHINA” written on its side, as proof of its humble origins.


Day 19


Exiting Sandwood was only the beginning of our day. We saw waterfalls coming out of the tops of fields, and our first sighting of peat harvesting. As the sun was setting, we had the most incredible descent which felt endless, and looked out upon a texture and colour that looked like cinema’s martian landscapes. We’d made it to Durness for a very windy, sleepless night


We managed to find a B&B so we could sleep the following night, but were faced with less than a week free in our calendar and 30 mph headwinds which were not expected to calm.


Day 21: Thursday 3rd October, 2013


We cut our losses and chartered a bus to Lairg, as the bike-bus had stopped running a few days previous. Train to Inverness and then we arrived in Edinburgh Haymarket in late evening.


It was at this stage that we knew we were cyclists.


We weren’t able to finish our Moulton Tour d’Ecosse in 2014 due to other commitments, but did complete the 55 mile route of L’Eroica Britannia on them, much to the amazement of many ‘serious’ cyclists. We plan to complete the tour in 2015.


Tobias Feltus:
Share

Modifying a rear mech for road 1×10 and a 11-40t cassette (Part 5)

One final piece in this puzzle is the rear mech or derailleur: no Shimano road-shifter compatible mech was designed to reach a cog even as big as 34t, much less 40t. In fact, cassettes with 36t have only become common in the past few years when 1×10 mountain bike drivetrains started to appear. SRAM has this under wraps since their10 and 11 speed  road shifters are compatible with MTB 10 speed rear mechs as well as 11 road mechs (but not their MTB 11 and 12 speed mechs). With Shimano 10 speed road shifters, rear mech compatibility is restricted to 8, 9 & 10 speed road mechs and 8 or 9 speed MTB mechs, except for 9 speed Shadow: though the cable pull should be the same, I have not been able to get these derailleurs to shift correctly on a road setup (I tried several combinations).

See the followup. This is arguably not a great solution…

What I ended up doing was modifying a Shimano XT RD-M761 mech, increasing both the main pivot tension and the B tension springs. Some blogs will suggest the use of a longer B tension bolt, but I find this rarely works as it falls off the tab it’s meant to push against on the mech hanger (see pic below). Dismantling a higher-end derailleur is pretty easy: to remove the B pivot, pop off a circlip. To remove the main pivot, there is a hidden allen bolt on the knuckle. When removing the main pivot, pay attention to what hole the spring was engaged in, and make note. You will want to put it back together using the other hole. It is my understanding that these two settings were designed for cyclocross/pave use, though it is also plausible they were a longevity feature for when the spring started to wear out. At any rate, clean off all the pivots, remove any dirt and grease, then regrease things before assembly.

RD-M761 spring tension modification

RD-M761

Modifying the B tension involves drilling a small hole about ¼ rotation from the original. I tried it further, but found the spring was under too much tension to assemble. If you remove the B tension bolt, the tab it screws into can be put in the jaws of a vice. Punch a centre for your drill bit, either using a punch or a wood screw.

RD-M761

To reassemble the B pivot, insert the spring into the main body of the mech, engaging its hole, then put the plastic washer on, then engage the modified plate in the correct hole. Using either plumber’s grips or vise-grips hold the tab you had in the vice and rotate it until it gets past its stop, and push the assembly together: hold with one hand whilst pressing the circlip back in place.

RD-M761

Reassembling the main pivot is similar, but much easier since the cage acts as a lever, and you only have to push a little pin in place to hold it together.

FOLLOWUP 1:

After 1400km of commuting daily, this derailleur has died (30/4/18).

Though the initial modification worked, I had to make minor adjustments almost daily. It turned out that one of the main issues was that I had (previously, whilst chasing drivetrain noise) substituted the stock jockey/pulley wheels with Tacx cartridge wheels. These are great, but only as tension wheels as Shimano shifting needs that floating jockey wheel, which aftermarket products don’t seem to offer. I replaced the stock XT pulleys, and shifting returned to near perfection for a whole two days (about 40km). The modified B tension has broken – I assume the spring has sheared.

My planned solution is to get a Wolftooth Roadlink and, if I can, a short cage 105 5700 derailleur to match the shifters in exact generation. I worry that the road link will put more stress on the hanger, but if it brings a more reliable shift, then I will be pleased.

More soon.

Tobias Feltus:
Share

Shimano ST-5700 exploded view & throw modification (Part 4)

If you happen to have taken apart your shifter, here is an exploded view of how it goes back together. It’s not that hard, but it is really fiddly. The upper two plates interact with the shifter ratchets and ratchet plates: they are the business end. I took it all apart and cleaned it with alcohol, then reassembled it dry and lubed it with TriFlow. This is not an ideal lubricant for a wet climate, but I am currently building this for the desert. Fortunately none of the springs need to be under load when you slide everything together, and once everything is together and the springs are loaded, you can take the pivot bolt out, push the assembly into the composite frame, then reinsert the pivot.

ST-5700 exploded view

The one interesting thing about taking this apart is learning how easy it is to modify the shift lever throw of the smaller paddle. The throw is less of an issue for me on these as compared to the older style of shifter (with external shift cable).

ST-5700 throw modification

Tobias Feltus:
Share

Converting Shimano ST-5700 105 shifters to 1×10 (Part 3)

1x drivetrains should only have a shifter on the right-hand side, for the rear mech, in my opinion. I mean, otherwise you have pointless machinery cluttering your cockpit, right? On a mountain bike you just take one shifter pod off, but converting Shimano road levers to a 1x does involve removing a shift paddle, in my books. The internets would suggest that no one has ever tried this. Removing the shift paddle from the left hand shifter is actually remarkably simple, takes about 10 minutes, is reversible and leaves you with only a tiny bit of brake lever play.

Removing ST-5700 brake lever

Remove brake lever assembly per Shimano’s instructions (see illustration), which involves moving a circlip from the inside end of the shift pivot pin: I used a flat object like a butter knife to raise the clip, then push or tap out the pivot pin. Removing the lower shift paddle involves the removal of another circlip, then it all slides out. Reassemble the brake lever, and the job is done. There is a lever-return spring which you may need to hook into its little hole on the composite frame, but I found this to be pretty easy with a small flat-blade screwdriver.


Tobias Feltus:
Share

1x drivetrains for road: selecting gearing (Part 2)

Selecting the gear ratios is the easy part. You go HERE and input what you are currently riding, then try and mimic this with a single cassette.


I am of the firm opinion that all bikes are sold with bigger (longer, greater gain ratio, or bigger Gear Inches) gears than the average strength rider can push. I know that I have never spun out a road bike with a 50/11, and the descents into Bartlett Lake are among the longest and fastest descents I’ve ridden, barely spinning out a 46/11 at over 40mph in an all-out effort. So I think it is fair to say that I don’t really need anything over 100 Gear Inches.


My CrossCheck had a 34/46 with an 11-32 cassette (8 speed), my new setup is a 40t Origin8 narrow-wide and a Sunrace 11-40 cassette. I dropped a couple of gear inches off the top end, and gained a couple at the lower end, based on how I use the gears. In detail, I had 29-84 gear inches and 39-114 gear inches: now I have chosen to have a single sweep from 27-99 gear inches. From riding, it seems like at the lower end of the ratios I have an rpm difference of around 5 between sprockets, and at the higher end it is around 10: this is vaguely comparable to a road setup and oddly similar ratio spacing to my previous setup, but its all on one shifter, simple and linear.

This is my gearing comparison HERE.

After a few commutes, my only comment is that the 40t is too close to the 36t in pedalling rpm, so I may opt for the 11-42 on my next build (the only difference is the biggest ring), sticking with a 40t chainring, rather than changing the tooth count on the chainring (this will probably be a gravel monster, SRAM equipped and with a power meter).

Tobias Feltus:
Share

Shimano 105 1x drivetrain considerations (Part 1)

Despite the fact that SRAM has been touting 1x drivetrains for a few years, killing off the MTB front mech and making road shifter compatible clutch rear mechs as well as selling left-hand levers which don’t have shifter internals, Shimano seems to have closed its eyes to this trend, as have all forum discussions on the topic. This has all become more pertinent now that, for the 2018 road season, team Aqua Blue Sport has signed up with 3T to be the first pro team (road) to race on a bike which is unable to use a front mech or rim brakes. This makes road 1x systems a very real present.


In my quest to run a drivetrain where I use all of my available gears efficiently/equally – and after choosing the gearing on our touring bikes which was both arduous and aimed at a specific task, I decided to try a road 1×10. I was given a pair of heavily used 105 ST-5700 shifters, which are what I consider to be 2nd generation 10 speed, or SLR-EV levers, which have a slightly different brake cable pull compared to old Shimano, SRAM and Campagnolo. I believe they have an improved ergonomic design compared to the older hoods, and it is nice to have all the cables under the bar tape. I am a little frustrated with the inferior braking performance with the majority of brakes on the market, despite the fact that Shimano launched this cable pull in 2008 with the Dura Ace 7900 series, there are very few fully compatible brake options. Seriously, 10 years later and I am not aware of a single third party brake lever which is labelled as being deliberately compatible with the cable pull of these levers.


My list of tasks were:

1: Select gear ratios that will not be compromising.

2: Remove the shift paddle from the L/H lever

3: Clean/lube shifter mechanism.


I’m going to break this up into separate posts.

Tobias Feltus:
Share

How much does rim width affect tyre width?

I’ve been wanting to move to actual tubeless rims on my MTB for ages. This past year I’ve been riding with a Stan’s No Tubes conversion kit, with the rubber rim strip sitting in my bead. Though this works, it is not ideal as it is still pretty hard to get a tyre to seat properly (I never got my front to seat without a wobble to it), and technically it is not as safe as a true tubeless rim. My front has been a UST tyre, my rear has been a non-tubeless Schwalbe. I’ve gone through two rears. The UST tyre has kept its fluid with little loss, and only one small Stanimal (coral-like creature made by tumbling liquid latex inside a tube for months). My rear just started weeping sealant through the sidewall, as well as loosing large chunks of tread, so it was time.

The wheels I’ve been riding on the Yeti are lightweight American Classic MTBs, 17mm wide bead on their older 225 hubs. I was planning on relacing these hubs to new rims, but I was offered a set of carbon rims on Hope Pro Evo2 hubs, so went for that instead. The new rims have 27mm bead seats, which is a significant jump. So how does this affect tyre width? oddly, not much. I would assume that there is some maths involved, but a change in tyre/brand as well as the lack of standards contributes to the fact that I went from a 2.25″ (57mm) tyre to a 2.1″ (52mm) tyre, widened my rim by 10mm and lost 4mm of tyre width, which is reflective of the ETRTO tyre width, and not the rim width. I guess there is a possibility that the width of a tyre will not be affected by the width of the rim, and that the latter only influences the shape of the tyre, but this is utterly counterintuitive.

The only attempt at making a tool to calculate how a tyre will fit in a frame on a given wheel was set out in THIS post by Wheel Fanatyk in 2013 and, as far as I am aware, the tool was never produced. Next time I change rear tyre I will stick with Maxxis and try a 2.25″, and it will probably fit the same as the Schwalbe did on the 17mm rim.

Tobias Feltus:
Share

Amazon’s counterfeit SRAM mount for Garmin.

I ordered a Garmin mount on Amazon. As per usual, it is very hard to figure out whether an item is sold by them, or by a marketplace listing. Turned out the item ordered came from China, something I only found out when it arrived.

I clipped my Garmin Edge 1000 on the packaged mount and it felt sloppy. I decided there was no way this was a legitimate SRAM product, reported it as counterfeit and was instantly refunded, and the listing vanished. I finally got around to ordering a new mount, this time directly from SRAM through QBP. The copy is pretty accurate. Packaging is almost identical, and the screw in the genuine part looks inferior to the copy. However, the genuine mount holds the twist-lock Garmin snugly, the text printed on the mount is whiter and also slightly curved. In fact, I believe the only way to visually identify the fake is by the curvature to the SRAM print.

The mount ordered is the MTB version, which has a different angle designed to hold the Garmin over your stem, rather than out front. Though I like not having the device project forward from my bars, the position means that I’ve had to angle it more up – parallel with the ground – to be able to see it, and looking down is more involved than just glancing at the head unit with the original out front mount. It has its pros and cons, as does everything.

Tobias Feltus:
Share

Road Tubeless: probably not ready for market.

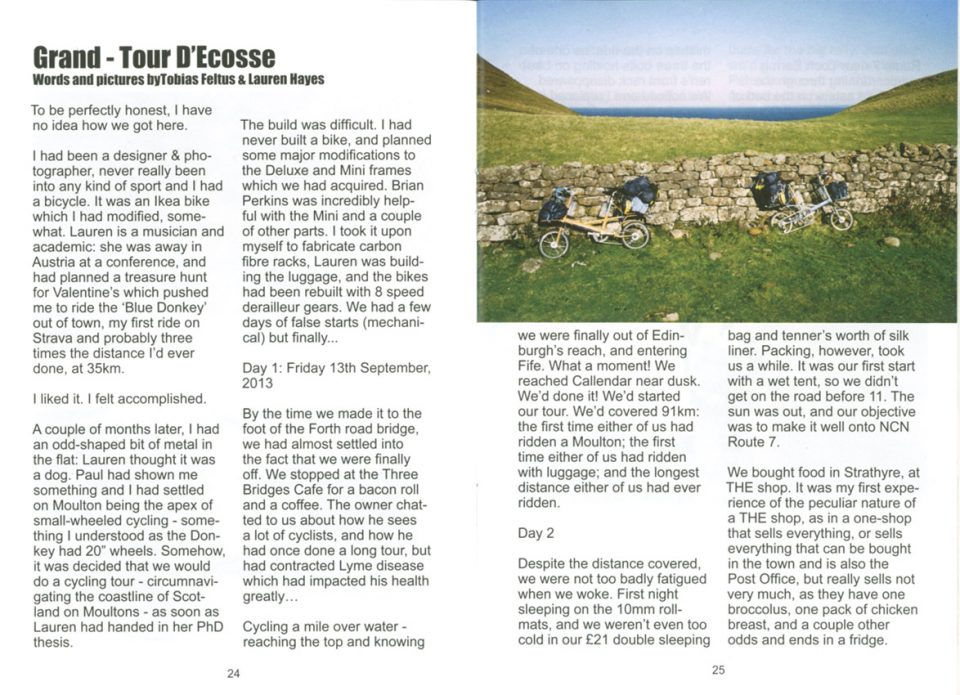
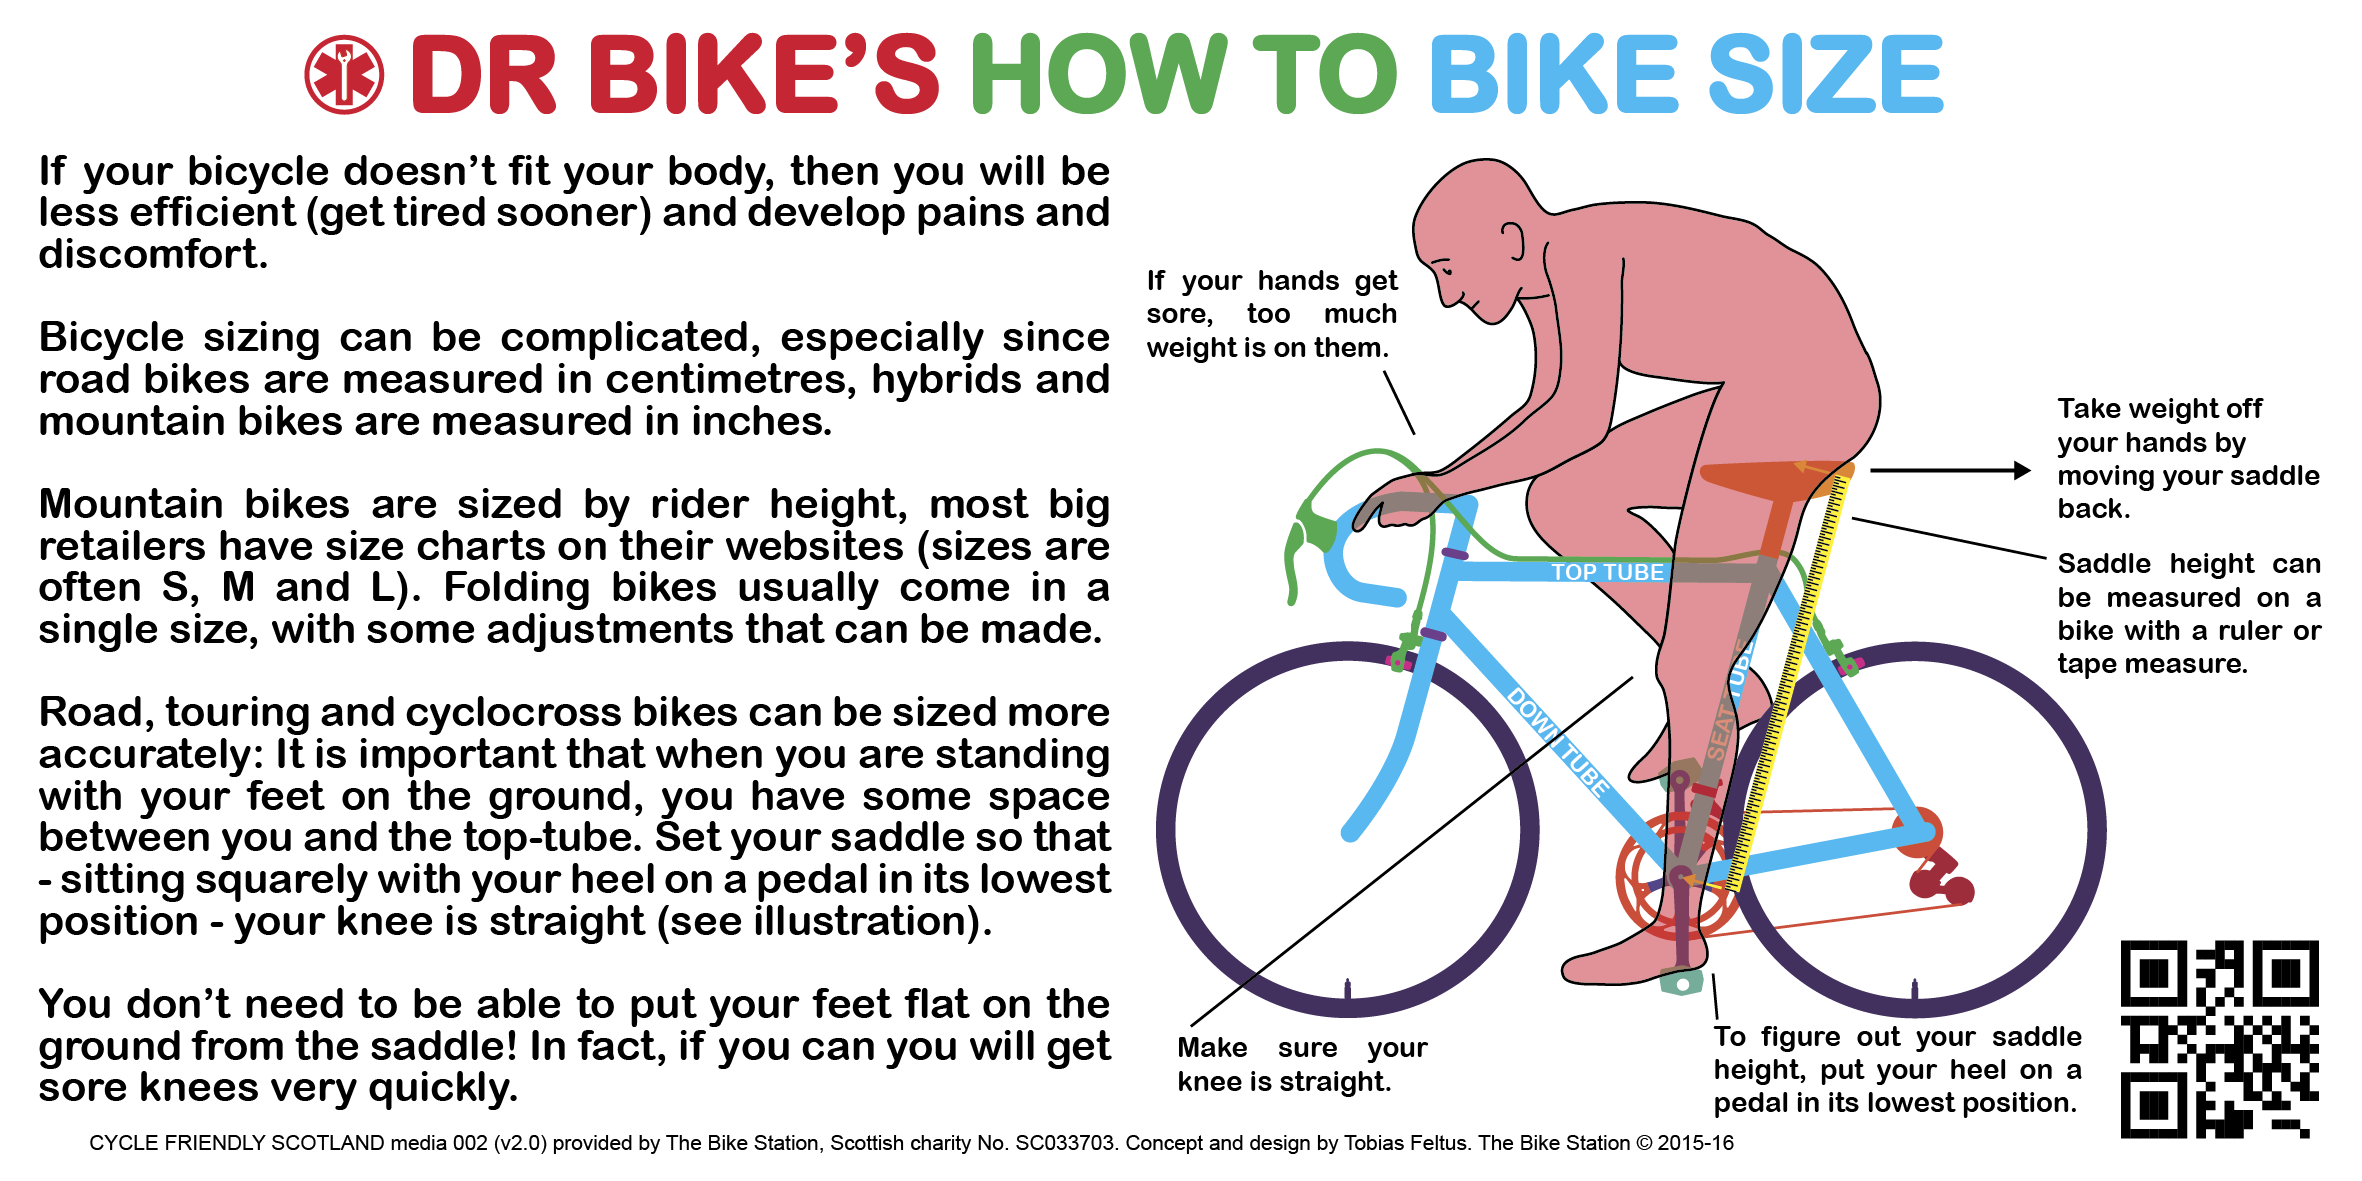
In 2016 I built two bikes for long distance touring. Iceland was our original plan, so durability was the first deciding factor in many decisions. I had decided that we should go tubeless, but this proved to be a problem. Here is my correspondence with WTB, the tubeless-ready rim manufacturer I chose.

ME:

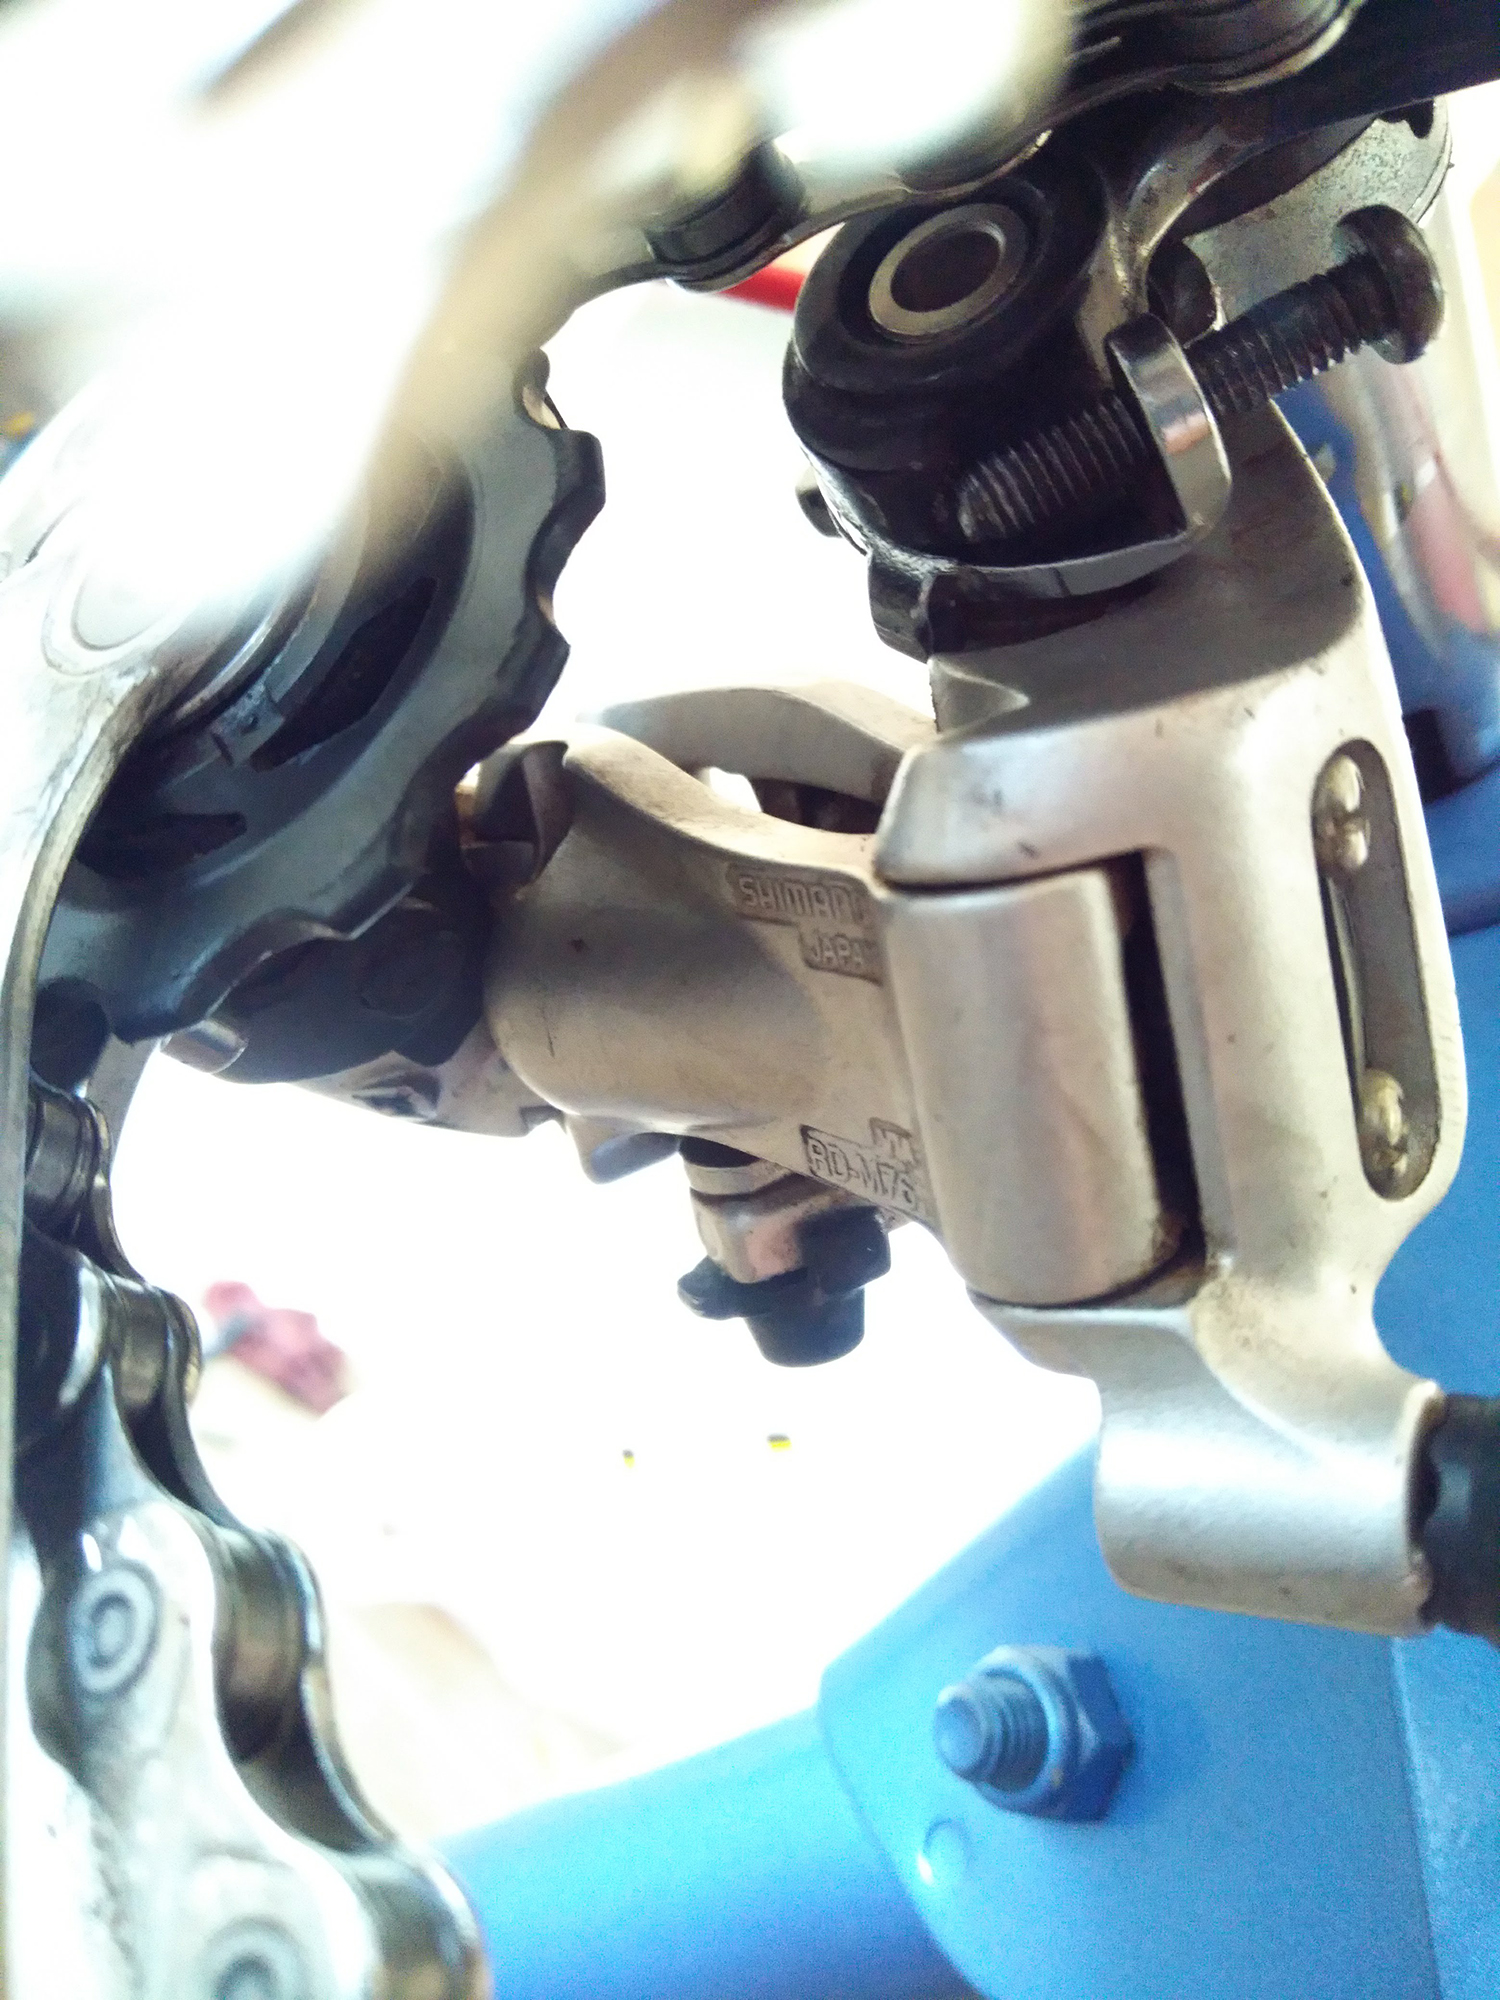
I had wanted to go tubeless for touring, and there aren’t too many options when you are using rim brakes. I chose your ChrisCross i19. Every choice in the wheelsets (2 of) was meticulous and aimed at reliability, using DT Swiss Alpine III spokes, Deore rear and SP-Dynamo front hubs.

On the first day of our tour (also our honeymoon, from Budapest to Assisi) we both suffered rear blowouts. Blowouts as in we were going down a hill pretty fast, and the back tyres exploded off the rims with no warning. Skidding to a stop obviously damaged the rims and probably the tyres. Had the fronts blown, then we may have spent the rest of our honeymoon in hospital, but thankfully we were able to avert accident. I now have very little trust in tubeless and in WTB. The rims come with no information or limitations, and there are no warnings on the internet. The tyres are rated for 60-90psi, and we started with 60 rear and 40 front.

I consider the Chriscross i19 rims to be unfit for purpose, and cannot recommend that anyone use them.

The i19 caused considerable discomfort and worry for several days following the incident. I would also emphasise that I invested many hours of research into rim choice and tubeless for touring, which could have been averted had I gone with standard touring rims. Between research and build, the wheelsets are probably worth around 70 man-hours plus parts. Of further note is the fact that the i19 were pretty hard to set up as tubeless, as the bead well is of a shape that does not seal well with standard conical tubeless valves, and the join seems to leak (as in it is possibly not welded), and sealant still bubbles out of the rims during inflation with tubes, a couple of months after the tour! I also had to ream and remove loose material from many of the spoke holes.

Had I not been after a tubeless setup, I could have settled on one of many tried and trusted touring rims with eyelets, lower weight and RRP.

Aside from the time and money wasted, I feel that this product has caused us significant danger and distress and that we should be compensated. I look forward to hearing from you on this matter.

WTB:

Tobias, I’m very sorry to hear you are facing some issues with our ChrisCross rims. It is very unusual as these were strictly designed for tubeless usage, we sold load of these rims all around the world and we never received a similar claim for them.

We all here are riders, and do not sell products we do not fully trust in, so to identify what might cause your problems I will need more details from you.

Tobias, could you please confirm, what rim strip or tape you used and also what tyres you put on.

ME:

The rim tape used was Tesa 4289 (Stan’s Yellow), 25mm. Valves were RSP, which I ended up supplementing with a fatter o-ring on the inside to seal better. Sealant was Stan’s.

Tyres fitted were Vittoria Voyager Hyper (folding), 37-622. I had wanted to use Schwalbe Marathon Supremes, but there was no UK stock. Since one of my colleagues has been running the Voyager Hypers tubeless on his Stan’s Iron Cross with now issues, I figured the only issue would be pressure loss through the sidewalls.

WTB:

You are using our ChrisCross TCS rim. These rims require to use WTB TCS 24mm rim tape to provide optimum mounting, fit and seating of UST (Universal System Tubeless) or WTB TCS (Tubeless Compatible System) tyres for tubeless use or standard ERTRTO/ISO tyres for use with tube. It’s necessary to completely cover the spoke holes, inner rim well and rim joint to ensure a secure, uniform air-tight, tubeless performance.

You used Tesa 4289, which is not that wrong, but 25mm width, might caused you troubles to stick it properly and therefore your rim was leaking sealant through the join (We use sleeved joint (cold joint) for ChrisCross rims, as it is much stronger than the welded one and much lighter than pinned one). Here’s video manual, how to tape it properly. It is very simple process: https://vimeo.com/61829564. Once it’s done this way, your rim is perfectly airtight.

The second issue here are tyres.

TCS rims (including ChrisCross rims) are designed to be used tubeless with TCS or UST certified tyres, or with ETRTO/ISO certified tyres, but with tube. The main reason is, that TCS and UST standards has much tighter tolerances to guarantee perfect tyre/rim fit. By converting ISO/ETRTO standardized tyres to the tubeless you are risking that the tyre can burp of the rim (ETRTO/ISO standardized tyres have slightly bigger bead diameter and also different bead shape), which can cause serious injury as you pointed below.

You are using standard, tube type kevlar bead Vittoria tyres, which were not designed for Tubeless usage, but for tube usage. They might work with Stan’s rims, due to bigger diameter of the Stan’s rims, but it’s not guaranteed.

Simply put: Stan’s rims have a larger D1 dimension than allowed under ETRTO (which uses the UST dimension standards for tubeless, and which dimensions are in ETRTO). They use larger D1 diameter, as they wanted to allow to fit standard tube type kevlar bead tyres.

I’m sure this information will help you to get familiar with TCS or UST products. You are using very high end components on your bike, it would be a shame to return to the tubes (please just make sure your tyres are marked by TCS or UST logo). I understand your doubts, especially when your “tubeless’ start was that bad, but It seriously reduces the risk of puncture and flatting, when it’s used properly.

ME:

I didn’t have any problem getting the tape to seal. 0.5mm either side with something like 180 micron tape, double layered is really only the thickness of the tape over the recommended width. I think my issue with leaking was around the valve. I bought a pair of Roval valves, which are more similar to UST valves in shape, but got the wheels to seal well enough before I fitted them.

What you are suggesting about the rim’s bead seat diameter is plausible, however:

A: it is relatively standard practice to “ghetto” tubeless on mountain bikes, either using non-tubeless tyres on tubeless rims, or even non-tubeless rims and tyres. I’ve heard of burping, but never heard a report of a tyre fully blowing off a rim without a loss of pressure beforehand.

B: WTB rims come with no instructions, no warnings, no assembly guides, and there is no online help. This suggests that they have no limitations or compatibility issues.

C: TCS is a WTB specific system, and has a limited range mostly of MTB tyres. No supple road or touring tyre.

D: UST is a system that Mavic designed for MTB, and as such there are only a few tyres designed for the system, as far as I am aware they are all MTB tyres too.

So as a cyclocross/touring rim, I would expect the ChrisCross i19 to be compatible with any tyre that any other rim is comfortable with. The general understanding amongst the mechanics I work with is that Tubeless Ready tyres are more airtight and have a smoother bead, but otherwise are the same as their non-tubeless cousins, and therefore only a luxury, not a necessity.

If the tyres are indeed the reason for our problem, then I feel that the rims should have come with a clear warning that it is not recommended they be used tubeless with non UST/TCS tyres at risk of them causing danger and injury. This warning would have to be both on the rim and the website, as a pre-sales warning.

WTB:

Vittoria Voyager Hyper is not a tubeless tyre and should not be run that way on any TCS or UST rim. WTB does have the Exposure 30 and 34 tyres if you wish to run tubeless. Problem with non-TCS or non-UST tyres is that the beads are almost always too large in diameter. To add to the effect when running fully loaded bike on long descent you generate a tremendous amount of heat the rim that can cause an oversized tyre to blow off the rim.

This “ghetto” tubeless practice is wrong and very dangerous as you could see. Assuming that every non-standard part one puts on his bike and it will work perfectly is potentially going to get hurt him.

Following international standards is the only right way to guarantee the safety.

Tobias, all user manuals are here: http://www.wtb.com/pages/resources, including the info about Tube Type rims and TCS rims.

I’m just trying to show you, that we at WTB do whatever we can to keep our riders safe and the only way to do it is to follow standards, not just say it’s “tubeless ready” with no certain diameters and tolerances.

ME:

I understand your point of view, but I am sure you are aware of a plethora of guides from established and respected sources recommending tubeless setup with non-tubeless parts… for example https://youtu.be/mH1O2W7E_wQ

I still feel that the WTB site should have a very visible warning stating that the rims should not be used with non TCS or UST tyres. I have previously searched at length to find thais guide https://cdn.shopify.com/s/files/1/0202/9884/files/TCS_WTB_Rim_Users_Manual.pdf?842393167070827044

and even now that I have it, finding the relevant part of the text is not straightforward. I don’t think it clearly condemns the use of non TCS/UST tyres. It does mention the need for accurate spoke tension, but does not provide a guide chart. Before building I did attempt to find tension guides, and tried to contact WTB for this.

I understand that WTB tries to do what you can to keep riders safe, but when the site does not easily provide warnings, and parts don’t come with warnings before mechanics build, riders will probably be unaware that they are doing anything risky.

WTB:

Tobias, well, yes, there’s tons of videos or manuals, how to convert tube type rims to tubeless, but it does not mean it’s right. Tube type rims has different rim well profile, usually completely miss bead locks, so yes, there are ways how to convert that, but it’s wrong. As well as tube type rims are not designed for tubeless use, as we discussed previously.

Brands should follow international standards, that’s the only way how to guarantee perfect compatibility. Without that, you never know the diameters, tolerances, basically nothing. Unfortunately, not everybody does that. We do. So perhaps your question could be addressed to Vittoria too, why they do not put warnings on their tyres, that tube type should not be used tubeless.

Tobias, I do not want to sound bad, we have it very clear in the manuals, but we are also listening you, I agree with you we could make it more visible and easier to find. We’ll work on this with our marketing team and probably list this info next to each rim, not only to the resources section.


Conclusion:

Long gone is the time when the customer was always right.

Evidence would suggest that the tubeless trend is still not market-ready. Similarly to how tubular tyres may only be suitable for professional use (with tubs glued by experienced mechanics, not by me, not taped as they can apparently roll off a rim), tubeless appears to be a mixture of prayer and jerry-rigging.

I was hoping that—as a respectable American company—WTB would offer replacement rims since I still consider the danger and error to be their responsibility. Sadly however I was offered a series of explanations which are easily interpreted as accusations and excuses.

I spent several hours looking for the manuals on the WTB site. I am not joking. I could not find them at the time, through Google nor link clicking on the site.

In principle, tubeless tyres are the way forward. In practice I am still extremely skeptical. A friend and fellow mechanic had his road-tubeless tyre blow off a Stan’s rim shortly after my experience, and he was using Stan’s tape and a tubeless road tyre. Some people don’t have issues, but sadly I think these people are just lucky.

Furthering my stance, videos on tubeless conversion from

Park Tool https://youtu.be/MuEiBSAKWLI

MBR magazine https://youtu.be/mH1O2W7E_wQ

Glory Cycles https://youtu.be/-AqDCaHKTeQ

In fact, the only video or set of instructions which suggests strict compatibility is Hutchinson https://youtu.be/mBa88zZossE

Tobias Feltus:
Share

New work – Illustrating Dr Bike

#drbike

Dr Bike online media 2016

In 2015 I embarked on a project at The Bike Station, to create an extension of Dr Bike, attempting to empower the general public and demystify the technicality of bicycle maintenance. Sound familiar? Demystification is something I have been into for a while, though I hadn’t really taken it into the realm of infographics before. The 2015 media was printed as 3 distinct Z-Cards which worked well, but lacked the media push to make them truly public.

This year we decided to revamp the Z-Cards adding a fourth, for symmetry. Professor Chris Oliver, Scotland’s premier hand surgeon and epic ambassador supreme of cycling social media and the link between science, medicine, politics and enjoyment, offered his support in writing material for the 4th pamphlet, in exchange for being able to share the media with his 17.3k Twitter followers. A pretty good deal all round.

Downloadable versions of the printed material are here: drbike1 drbike2 drbike3 drbike4 And on The Bike Station’s website. The printed material will be available from The Bike Station’s 15th birthday (and having recycled over 50 000 bikes), this coming Saturday 22/10/16.

Breaking these into around 40 Twitter friendly infographics has opened the possibility for the media to be expanded gradually, and my next additions will add a series on “family friendly” cycling – trainers vs balance bike, kid’s seats, trailers etc… And addressing different aspects of comfort on the bike, possibly with some tips from Douglas Shaw at Edinburgh Bike Fitting. Saddles, their differences and their comfort. Underlying physical imbalances. Ape-factor (relationship between upper body and lower body length) and how this can often leave you with a bike that is too big… I think there is a lot that can be put into writing and shared with #DrBike which will help people understand things that will help improve their experience of cycling and – in the long run – bring more active business to the industry.

Tobias Feltus:
Share

Review: Alpkit Kowari

Going out on a long road ride is exceedingly good fun. Pedalling at pleasurable speeds is infinitely easier than it would be on a touring bike, however the touring bike does offer the convenience of being able to carry anything you might ever need on that day-ride (and no, a backpack is not an option for me, if it can be avoided). The usual solution to the problem is to use a small saddle bag to carry tools and emergency supplies, and to shove some food and spare clothing into your jersey pockets.

I went out for a lovely “two bridges” loop yesterday (100km, over the Forth Road Bridge and the Kinkardine Bridge, via the Kelpies, Bo’Ness and back) with almost empty jersey pockets. I managed to fit my rain jacket, tools, charger, a spare tube, a giant sandwich, some munchies and I even added a pack of wet wipes to it before leaving. The Alpkit Kowari is indeed the perfect size for day rides, and its made in the UK!

Emperor Sport

Emperor Sport

My only criticism is that the main strap, which wraps around it holding the bag onto the saddle rails, is a bit shorter than I’d like, making it very hard to fit the bag to the bike after its been packed. Apart from that, my stuff stayed dry, and the bag did not flap nor rattle, and certainly didn’t fall off. Thankfully I didn’t need any of the emergency supplies either.

Tobias Feltus:
Share

Review: Morgaw Forsage saddle.

Forsage
I don’t remember how I came across the Indiegogo campaign, but it excited me and unlike all the other fundraisers I’d seen. I got my wallet out. I received the saddle almost a year ago and, for one or another reason, never got round to testing it before yesterday.

The design appeals to my ethics of trying to keep things as simple as possible. It is minimalist in its engineering and its aesthetic. The thought that went into solving an issue was concise and the solution is simple. We are beginning to see more of this cottage-industry lead by users (Morgaw was started by retired professional riders), but usually this leads to goods which are not refined because they are not developed within a network of people who know what they are doing.

What makes Morgaw saddles different is the fact that they have an elastomer link between the rails and the shell, and that this elastomer block can be changed to suit rider weight. The shell is relatively ordinary, with a moulded fibre reinforced plastic shell and an in-mould bonded pad/cover. The elastomer blocks are bolted onto the base, and the interchangeable rails then bolt into the blocks. I have the aluminium rails (the carbon ones cost a little more), which make for a 200g saddle. Unlike many saddles, the rails sit perfectly horizontal with the top of the shell, which is something I rather like from an aesthetic standpoint. In fact, the whole stack height of the saddle is around 45mm, which is slimmer than most.

Forsage

There are a couple of potential issues: the oval rails mean that you probably can’t mount a Morgaw saddle on a seatpost which has side clamps, like those on Trek/Bontrager posts. During the Indiegogo campaign Morgaw was offering a seat post which did have side clamps designed for these rails and may have been compatible with other posts, however they are not currently offering these (and changing clamps would only be necessary on a bike which has a proprietary post, like many carbon offerings). The other issue is partly why I waited so long to test the saddle: the rails don’t accept the mounts for Ortlieb nor Rixen & Kaul equipped saddle bags, which meant that I didn’t want to take it on a long ride (almost no space between the rails and the shell). I was given an Alpkit Kowari for my birthday which uses straps rather than a clip, so I was able to take it out.

Forsage

I took it for a 5h (100km) ride with 700m of ascent, on my newly built 1977 (steel of course) Emperor Sport, fitted with 25c Continental Gatorskins at around 80psi. The ride was mostly on tarmac with many rough sections, but also included a reasonable amount of gravel and mud. My bum didn’t hurt in the slightest, and I was pleased to find the ride to be very compliant. The non-scientific nature of my test is highlighted by the fact that it was the maiden ride of the entire build, so my first time on the frame, and my first time on the Felt UH Carbon seat post.

The saddle is comfortable. The shape seems to fit similarly to a Fizik Arione, despite being wider and flatter. The flatness did worry me as I really didn’t get along well with a Bontrager Paradigm RL that I’d bought last summer, which seemed to have a less of a curve to it than the Arione. The shape of the nose on the Forsage does allow for a lot of fore/aft movement, which meant that I was able to comfortably slide forward and tuck in whilst trying to keep up with traffic on the A904, without feeling any discomfort.

Emperor Sport

Emperor Sport

The current price point of the Morgaw range (around £100) puts it in an area full of high end competition, though the competition which I find as exciting from a design and innovation perspective are the Brooks C17 and Fabric ALM, both of which cost roughly twice as much. I am glad that I supported Morgaw’s entry to the market (they are distributed in the UK by Ison), and thrilled that the saddle stands up to my hopes and expectations.

Tobias Feltus:
Share

The Program.

I don’t actually watch feature films that often. I seem to be hypercritical to the point that my suspension of disbelief can be thrown by a minor detail, and the film can loose me in an instant. But thanks to BA’s inflight entertainment, I chose to watch Mr Sherlock (pity, pity they couldn’t be bothered to get a script written, nor have a photograph made which looked vaguely authentic, when so much work went into the rest of the film. Spoilt by two rather important ‘features’), and Frears’ The Program.

Last year The Program (2015) was released, and I don’t recall hearing much of it. Frears was—I had thought—a respected director. My first perplexity was with the American spelling of the title of a British film, but I know, that is just one of my pedantic pet hates.

Frears would have been aware that in making a film about a hugely controversial person of recent history, who is the subject of many articles, books and documentaries, his own creation would be under strict scrutiny. He chose not to take the creative license of fully fictionalising the story ‘loosely based on the life of Lance Armstrong’, but rather went down the route of the docudrama.

My opinion of the film is that the writing is very poor, making the narrative feel rushed and compressed. It would have been more interesting to focus on a part of Armstrong’s life or career, and build characters well enough that some empathetic connection could be made: this seems to be a common shortcoming, as though it were impossible to direct the empathy of a viewer within a non-fiction narrative. Nonsense. Cinematography was half decent–the race footage was well crafted, though the use of two ‘artsy’ shots seemed out of place (one close wide-angle shot of the journalist under fire, one sunset backlit shot of Lance). Production design was very poor, with many inaccuracies which were clearly going to be shat on by the cycling community. Sound design was—let’s say—creative.

Three particulars which stood out for me were:

In the opening shot—an artsy slow-mo of Lance cycling up a hill—the chain noises were oddly in your face, synthetic and totally uncharacteristic of a racing bike. Lance was famed for his cadence and fluid pedal stroke, not a slow clickety-woosh, clickety-woosh. these sound effects were used consistently through the film, which could be viewed as a good or a bad thing.

So Lance gets cancer, then he pesters Dr Ferrari into making him a winning cyclist. I have no idea why everyone insisted on his name being Michela Ferrara. These scenes presented a shocking historical inaccuracy, as Lance was pedalling on a turbo trainer with Ferrari talking about what they would do: the bike on the turbo was shown clearly to have a Hollowtech II bottom bracket (detail shot), which Shimano launched in 2003, this scene would have happened around 1997-1998. The film chose to focus on Ferrari’s use of drugs to cheat a performance increase when he also found that Armstrong’s loss in muscle mass could be compensated for by using an increased cadence. Thanks to Ferrari’s insight, Armstrong was the first cyclist in the professional peloton to use a high cadence (over 90rpm) which is today’s norm. They did briefly touch upon USPS’ revolutionary team tactics (also standard today), but chose to leave these two important details in the shadows, rather than focusing on them, which could have been interesting.

An editing mistake which would have thrown anyone of a non-mechanical persuasion was the springboard of Armstrong’s first post-Ferrari stage win: he’s at the back of the peloton with the team car: the mechanic reaches round and (detail shot) tweaks the cable pull on his rear-mech, which then catapults Armstrong’s performance past everyone to the win. Really?

The film left me feeling much the same as I felt after seeing 127 Hours (2010): baffled by the lack of character development, and disappointed that the film didn’t even try to suspend my disbelief.

Tobias Feltus:
Share

Mechanical “doping”. Yea.

The new ‘thing’ that the UCI is into is ‘mechanical doping’. The term ‘doping’ is clearly used in the same fashion that one can be a ‘chocoholic’.  Let’s assume this part of the recent story is humorous.

The past couple of weeks have brought us rumours of the UCI having discovered the first electrically enhanced bicycle at a cyclocross race, and then videos of officials ‘scanning’ a bicycle with a tablet computer have also appeared. Now, the facts are few: all that we really know is that the UCI may have lost the most important races of the season from ASO, the body who owns the Tour de France and some of the other pivotal road cycling events on the calendar. This may call for some PR stunts, might it not?

Firstly, detection of large batteries, motors and planetary gear systems in a plastic bicycle would be easily accomplished with a DIY shop stud finder like THIS one for £40. Also, road race bikes weigh between 6.8kg and 7.5kg: so if a rider turned up to a race with a bike that weighed 7.8kg, this would be silly. If a rider turned up with a bike that weighed 8.5kg you would have to wonder what was going on. I mean, high end steel bikes in the 1980s weighed less than 8kgs, so using scales would also be a fast way of detecting a suspicious bicycle at a race. Understand, UCI?

Back to the alleged ‘doping’. THIS is the video in question, which seems to provide the speculation on Fabian Cancellara.

Going back to the weight, the motor unit and its battery (VIVAX) weighs “just” 1.8kg, which is light for an e-bike system, but would put most racing bikes over 8kg. If you read BikeRadar’s review of the Gruber system, they also mention how noisy it is, so there is a good likelihood that another rider would hear the motor. Carbon bikes sound like a bit of paper being flapped, and don’t produce a high-pitch whine.

If it weren’t for the BikeRadar article, I speculated that these units may not actually exist. Most of the images available online are not of photographic origin, suggesting they may be non-existent prototypes. Might I also add that the BikeRadar article does say that it cannot be installed in a carbon frame. I shall get to this later.

I don’t think the videos show anything erratic in sufficient clarity with regards to Cancellara’s hand movements, which the narrator is suggesting implicate that he is pressing a button to activate the motor. The video is of sub-PAL resolution. What the video does show with reasonable clarity is that Cancellara’s body movement does not change from the way he was pedalling previously: in the second clip (5:20) on the cobbles in Flanders he is bobbing quite a lot, suggesting he is fatigued but pushing. When he shifts gear he increases cadence, and moves forward. I think that if you had an additional 200w (the rumoured advantage of these systems) he would stop bobbing and take a more composed pedal stroke, and also drop gears to slow his cadence.

A historical point is that EPO allegedly gave riders 1% increase in endurance (a figure I recall from some documentary, though this article is suggesting much more), which over a 4 hour race could be significant. Both Pantani and Armstrong would take off like Cancellara in those videos, and we know that taking off in that way is not 1%, but rather something like 40% for a minute or two. So that kind of acceleration should be within the human athletic ability, and not made possible by blood transfusion or taking drugs.

Back to the motors, I am also curious about the structure of these things. The BikeRadar article suggests that the seat-tube motors can’t be installed in carbon frames, and I can assume that this is because they do not have smooth tubular interiors. The motor is held in by two 4mm bolts, screwed in from either side of the frame. So these are visible fixings (UCI?). Also, for that gear to not slip, the whole motor shaft would need to be held rock solid in relation to the bottom bracket spindle: holding it by two bolts would mean that it would tend to flip fore/aft. I would suggest that to be functional these motors would need to be fixed solidly to the frame within the bottom bracket shell. The lack of actual photographs of these drive systems suggests, to me, that they are a conceptual prototype and don’t actually exist. But this is also speculative and contradicted by the BikeRadar article. Also, most of the images of the motors show oddly angled gears which—to my understanding—would tend to push the motor up, and possibly slip, rather than pulling it in to keep it from slipping.

My conclusion is that I am extremely skeptical. I think there is a high probability that the UCI is trying to gain ‘good’ PR in light of the quarrels with ASO. I think the motors would be too noisy to ride in a group without competitors being aware of them. I think that the weight of 1.8kg is pretty high, and am doubtful that it could actually deliver sufficient power to make this weight increase viable in the hands of the cycling elite. I am skeptical that these motor systems work as they claim, as the fixing system looks delicate and subject to engagement issues, especially within the large, boxy, tapered tubes of Cancellara’s Specialized bike. And finally, I don’t think Fabian Cancellara would actually take this kind of a risk. Not that I am a fan, nor foe, but I just don’t see it within him.


Tobias Feltus:
Share

The burning question: Can I use a Shimano road Bottom Bracket on a MTB?

Well, it was a burning question because I realised that my mountainbike’s bottom bracket had seized and I didn’t have a spare. Yes, I could have purchased a new one, but I had two perfectly good part-used road ones sitting on a shelf.

MTB vs Road Bottom Brackets

I had found some speculation on forums, and some disagreement about measurements. So I used my Vernier to measure the parts of an SLX vs a 105 Shimano Hollowtech II bottom bracket. What I knew was that the plastic internal dust-spacer was longer on the MTB one, and what I confirmed was that the Road bottom bracket has slightly wider cups. I have no idea why, to be honest. I would imagine that the bearings are identical, and according to common belief, the MTB units have “better” dust seals.

MTB vs Road Bottom Brackets

So this is the result of my measurements. My Genesis Altitude 10 has a 70mm BB shell, and BSA threaded road bikes have 68mm BB shells. So I was easily able to fit the Shimano 105 cups with the MTB dust-spacer on my Altitude – with the SLX BB I had one shell spacer driveside, with the road cups I have no shell spacer.

Interestingly this also means that if you were to have chainline issues on a road bike, you could use a MTB bottom bracket (cups, with a road dust spacer) and then be able to use 1mm worth of shell spacers to move the chainline by a smidgeon.

Secondly, this is interesting because CRC currently sells the XTR BB93 for £25.50 and the Dura Ace 9000 BB for £21 and – assuming they are pretty much identical – this offers some price and fitting leeway for affordable top-end components.

Original post 11/04/2015

A mini update on 20/5/2020, my colleague Ben successfully installed a Shimano MTB crankset on a frame with a 72mm BB shell using a Shimano road BB. This updates compatibility showing that there is leeway for at least 2mm within the (now older) Shimano BB/crank design.

Tobias Feltus:
Share

Moulton Tour d’Ecosse

Our cycling blog is a little out of date too, but it is HERE, and I shall add content soon. Promise.

In the near future a full article on our Moulton tour of Scotland (2013) will be published in The Moultoneer magazine.

Tobias Feltus:
Share