SCSI in 2023: a struggle to keep good machines running

For the past few years I have been struggling with old Macintosh computers dying, trying to keep my film scanners in good running condition. I have an Imacon (now Hasselblad) Precision II for 35mm to 4×5, and a Microtek ArtixScan 2020 which can scan 8×10 negs, or prints up to A3. Both of these use different SCSI interfaces. When I bought the Imacon it ran on a Macintosh MDD, and when that died I moved to a Quicksilver, then a second Quicksilver. As far as I can tell, with these older macs the PSU was usually the first thing to die, and there was often a struggle with RAM modules malfunctioning.

If you are reading this, I will assume that you are in a similar situation, so I am taking notes on here.

My plan was to try to move to Windows, since this would permit a slightly bigger selection of hardware and software to meet my needs and, most importantly, I get to work with a 10 year old computer instead of a 20 year old computer, using a standard PSU that can be replaced. All SCSI cards are PCI, so you need a motherboard with at least one PCI slot (not PCIe), and there are a couple of generations of memory which are worth avoiding. My brother-in-law gave me a Dell Optiplex 755 which has a decent processor, SATA and 2x PCI slots.

First thing to do: install Windows 7 x86 (32 bit): this was the last version of Windows to support SCSI fully, and the scanner’s driver won’t work on 64 bit, I tried. Fortunately I found THIS article by Grav which was a huge help. In 2023 Windows 7 is not easy to get running properly: Internet Explorer no longer works with the internet (!), and the only modern browser that will work is Firefox, but I was unable to get Firefox to install until I had managed to install 160+ Windows updates. I found that the Updater itself would not work until I had installed SP1 and a couple of other updates manually. When Windows is all up to date with its last options, you can install Firefox and AVG Free since Win7 is also vulnerable to virii. Also, go over to the Hasselblad site and download/install FlexColor 4.0.3 (the last version to support SCSI scanners. Do note that you can use the current version to edit 3F files on the same computer, since the newer software is a little nicer to use. (3F is Imacon/Hasselblad’s RAW file format: the Precision II can produce a full resolution RAW file from anything it can scan, which later can be tweaked for colour grading, sharpening, etc.)

Next thing is getting the SCSI cards to work: in my case the Device Manager would find a driver, but then tell me that it was not compatible with my OS. Frustratingly the Device Manager does not tell you what driver you need (as in what chipset you need a driver for), however the cards I had were both Adaptec, and they have a chip on them with the generation written on it: I had one AIC-3860Q and one 2906. I found THIS repository which has a large number of Adaptec drivers: I think that the ones which worked matched the first two digits of the chip number, which probably corresponds to the generation. Install the driver by “browse for driver software on your computer” via the Device Manager. When the card shows as working correctly in the Device Manager, connect the scanner, turn it on and reboot the machine.

Thanks to Grav, I then checked the Device manager, saw the Imacon scanner sitting there with a question mark, clicked to update the driver and navigated to C:\Program Files\Hasselblad\Flex Color English v4.0.3\INF and it installed the scanner’s driver. This is probably the only part which is strictly 32 bit.

Launch FlexColor and everything should work. I will have to dig around for all my profiles which may or may not transfer to a Windows machine.

I still think the Imacon Precision II is the best scanner under 2000 dollars/euro/pounds for 35mm up to 4×5. I have made huge prints from its scans.

Tobias Feltus:
Share

Finding the way.

I’d been thinking that I needed to complicate my life to rekindle my attraction to photography, and what better way than picking up a 4×5 camera, finding a film that is cheap and, more than anything, has very little technical data published anywhere on the internet?

Enter FreeStyle’s Arista Ortho Litho 3.0, an orthochromatic technical film (note 1) which, I assumed, could be exposed for continuous tone and processed in Rodinal, as I have done with Tri-X Ortho and Kodak Technical Pan in the past.

My first tests showed contrast, but some mid-tone. I exposed at ISO6, and processed by inspection, diluting Rodinal to roughly 1+150 (3ml/L), for 5 minutes. Subsequently, I read THIS article which suggested flashing the film, which is not something I have done much of. The idea behind flashing or pre-exposing film is that you deliberately fog the film, essentially pulling up the base exposure to just before it would otherwise start to show tone. In a digital world, it’s like calibrating, or changing a threshold. I set my enlarger to its highest position, and closed the lens to its smallest aperture, took one sheet that was undersized and cut it in half, flipping one half upside-down. I then marked intervals with a marker, and made 2″ steps. I found that flashing the film from behind gave me a little more resolution to my exposure, so I went with 3″. The goal is to choose a time that does not expose a tone.

I then flashed 2 sheets, and loaded 2 darkslides with one standard and one flashed sheet each.

The above test was shot with the Nikkor W 135/5.6 for 40″ at f22. Though the film does show reasonable detail on its own, the flashing did contribute a significant amount of mid-tone and highlight detail. The contact prints were made at contrast 1.5, and I increased the exposure of the flashed neg from 30″ to 35″. The flashed negative could be printed well at a higher contrast.

Similarly, this other test was exposed the same, but with the Tele Xenar (in Compur Dial shutter) 270/5.5, at f5.5 for 1/10″. I may have under-exposed this negative by a stop, as I am still not 100% on how bellows compensation works with a telephoto lens and I exposed it per the meter. The increased highlight detail is still significant, and I am excited by the results.

Processing on both tests was 8 minutes, dilution of 3ml Rodinal per Litre of water at around 20c, as it is too warm for me to really control tray development. Agitation is reasonably constant in a tray.

Note 1: The film is manufactured in Belgium, probably by Agfa in Mortsel. I also have a hunch that the film is sold as Ultrafine Ortho Litho, though this is based on price and processing data, as I have not tried the latter. I also do not believe it to be the same film as Agfa Ortho, as the Massive Dev Chart suggests it can be exposed at ISO25, and processed in Rodinal 1+24 for a mere 4 minutes. I really ought to try this rating, before ruling it out. I think I only ever shot a couple of rolls of Agfa Ortho, and probably in the late 90s. I am surprised that Fotoimpex does not have a packaging of this film for sale.

Tobias Feltus:
Share

Olympus E-P2 “full spectrum” conversion.

When we go camping out in the sticks I keep finding myself in awe of the night sky, and I’m drawn to photographing it, like a moth. My Fujifilm XPro2 is exceptional in low light, but I’ve found it almost impossible to get a sharp shot of the moon with a manual 135mm lens, and my swirly starscapes taken with the Fujinon 23/2 are sharp, but swirly.

After seeing Rick Oleson repeatedly taking crisp and detailed pictures of the moon with a variety of lenses, I decided to get a lens to take a picture of the moon. KEH had a Sigma 600/8 catadioptric lens in F mount for a decent price, and I decided to also get an E-P2 since it was dirt cheap, to try a full spectrum conversion. The conversion involves removing the IR filter that sits in front of the sensor (but behind the dust shield). I was planning to buy an IR “heat absorbing filter” from Edmund Scientific for another project, I’m hoping the filter out of the Olympus will work for this, which would make the E-P2 free.

I couldn’t find any teardown images for the E-P2, so I looked through a couple of Olympus conversions here, then got stuck in. I didn’t photograph the whole sequence. It is NOT EASY, and I take no responsability over your actions. Clear a good workspace with good light. Get some tape and paper to draw the 6 sides of the camera roughly, to sort screws.

Disassembly order:
1: Remove base (don’t remove the tripod mount as with the E-P1, it will fall into the sensor assembly), 7 screws.
2: Remove sides (top marks to Olympus for not requiring any adhesive trim to be removed for any of this).
3: Remove hot-shoe then top cover: hot-shoe has a clip covering the screws, this gets lifted from the front of the camera, then it pops out. The 4 hot-shoe screws are the only countersunk screws you will find today. Below the EVF socket you will find the only two longer screws you will see today, set them aside. The top plate is now held in by a couple of screws on tabs that poke through the chrome bezel, two of which have little springs on them.


4: Remove rear/LCD: 4 small screws, then one on the left on what looks like an earth-contact. Lift it up a little, then remove one screw holding the ribbon, flip up its clip and the rear comes away.
5: Remove 4 black screws from just outside the lens flange.
6: Gently remove some black strapping tape from the ribbons behind the sensor.
7: looking at tutorials for other Olympus cameras, I found the need to dissolder the ground to the sensor. Do this now.
8: One of the 4 screws that holds the sensor assembly onto the shutter assembly is hidden under the shutter ribbon. Disconnect the smallest ribbon (timer LED), loosely fold it back around the camera chassis and tape it out of the way. Unclip the other ribbons: most are the “traditional” kind with a black lever on the ribbon side which you can pop up with a finger nail, but the one at the top has a grey clip at the back (opposite the ribbon), very close to a bunch of components on the main board. This one is harder to unclip, be careful. This ribbon will not come out without removing the shutter assembly (held in by those 4 black screws you took out at the front). Gently wiggle the left side of the shutter assembly up: the lens mount needs to fit through the chassis, and you need to be careful of that ribbon you folded back earlier, it has folds in it more or less exactly where this assembly needs to move.
9: Remove the 4 screws which hold the sensor to the shutter: PLEASE be careful (I was not), there may be shim washers under each screw. They are magnetic, so you can loosen the screws and use a magnet to retrieve each stack and label them (colour code with a sharpie works). I didn’t know they were there, and they fell out, no idea where they are meant to go (more on this later).
10: 4 screws hold the dust shield onto the sensor assembly, I only removed 3, as you end up putting a lot of pressure on the stabiliser assembly, which I was not keen on. DO NOT TOUCH the inside of this piece of glass. If there is any air movement in the room you are in, try to stop it. Removing these 4(3) screws was the hardest part of the job.
11: Whilst holding the dust shield with one finger, use a tool to prise up on the black spring clip which holds the IR filter in place. It came out without getting too mangled. Once its out, there is a plastic mask, then the IR filter (I wouldnt touch its surfaces, I’d wrap it in a Kimwipe or something delicate). Now, put the dust shield back without getting any dust inside/on the sensor. Check multiple times with a bright light. Make sure the rubber seal is in place, then reverse the process of putting it back together.

NOTES: I tested the camera with just the shutter assembly back in place and the LCD plate attached, to verify the camera worked. I found that I could not reach infinity with a manual lens (and my F-Mount adapter does go past infinity!) so I took it back apart and removed all the sensor shims, which now permits it to go slightly past infinity. This is now due to the fact that the camera is picking up incompatible wavelengths of light. This may not be the case with your camera, but it is worth having a note of the shims regardless. AF seems to work fine with my Panasonic lens.

Though I am not a huge fan of polycarbonate chassis and screws threaded into plastic, the overall design of the camera is pretty robust and impressive. I especially like the fact that no trim needs removed to access screws. It is also worth note that the shutter is a Copal unit, I wonder how many cameras use Copal shutters nowadays? I did find it interesting that there are several motors in a digital camera. The shutter has a motor, the stabiliser has two motors, and I think there was another, though I can’t remember what it does.

The full spectrum image is weird, as it has both the attributes of “visible light” and infrared, which in daylight seems to look like a halo around a softer image.
Tobias Feltus:
Share

Thoughts on gear for a BioArctic residency.

I am presently on a residency at ArsBioarctica in the Arctic of northern Finland. Before heading out, I spent several weeks deliberating what equipment to bring. Part of this was deciding whether I should plan to work on a specific project, or plan for anything and everything. Though my initial plan was to work with a (non-existent) direct-positive paper to use in a 4×5 camera, I ended up bringing my Leica M3 (with the Summar 50/2, Elmar 90/4 and Elmar 135/4), Nikon F90 (with the 85/1.8, Micro Nikkor 55/2.8 and 24/2.8) and my GH1 with a dumb K&F Nikon adapter and a Zhongyi Lens Turbo II, doubling up my use of the Nikkor glass. I packed rolls of Fuji Neopan 400 and Kodak Technical Pan. Additional gear includes the Fujifilm XP 50, Gopro 2, Gossen Digiflash, Tascam DR-100 and a couple of microphones (audio gear being pertinent to my collaborative efforts with Lauren for Sounding Out Spaces), a Leica micro tripod, a mini lighting stand and my beloved Gitzo Tatalux with a single clamp Slik head.

For the work that I have been doing here, the Micro Nikkor has been the most valuable piece of equipment: a task which the Leica would never have been able to perform without pointlessly complicated accessories. The F90 is an effortless camera to use, with a fantastic finder, and the Micro Nikkor 55/2.8 is an absolutely amazing tool for bridging the gap between the minute and the macro — photographing mountains or looking at lichens as though they were forests (I realise there is an issue with the definition of “macro”, since in photography it refers to getting close and intimate with small subjects, whereas the dictionary definition is indeed the opposite of micro). I also know from recent work with Tony Obr that it is very good at creating abstractions, despite its very nature being that of having been engineered for scientific reproduction. And again, I don’t know if this is a generational thing — the fact that the F90 was “the” camera of my mid teens — but I find its operation both in Aperture priority and Manual incredibly easy to control, or far easier to control than the F3 or Fujifilm S3. The F90 is also very practical for field work, seeing that it costs very little now (so scratching it is no biggie) and will take up bulk-loaded film with a straight-cut leader, with no faff.

My M3 is still a dream machine. I don’t use the Leica often enough for focussing to be as effortless as it used to be: I presently find it awkward to have to move the centre of the frame to a focus point then back, being more used to focusing on ground glass or a liveview LCD. I feel comfortable with the knowledge that the Summar will soften some detail without losing crisp lines. I love the way the camera feels in my hand, and the non-event that I experience when I release the shutter. The main joy, and the part that people who don’t shoot with rangefinders won’t know, is that the extra space around the 50mm brightlines in the finder mean that precise composition can be made in peripheral vision. This is something that is really hard to explain, but I often find that with an SLR you can spend quite a lot of time lining up a horizon with the top of your finder and still get it off. With a rangefinder, or in particular a Leica M, you can do a lot more looking around and composing of corners: thanks to the extra peripheral view in the finder: more intricate composition feels easier. I don’t imagine this would be of much use for landscapes (and I wouldn’t recommend using a silk-shutter rangefinder for landscapes if there is any chance that sun might go straight through the lens and burn a hole in your shutter), but for taking pictures of people close up something magical happens in the user-camera-subject interface. It is a truly pleasurable experience.
The Gossen Digiflash is a fantastic little lightmeter which can measure both incident and flash (and theoretically reflected light, but who measures that?). Its size and weight is pretty much unrivalled, and if you only work with one camera at a time, it is pretty much perfect. Its pitfall is that changing ISO is as hard as changing the time on your old Casio watch. Two button operation, and no up/down. For this reason I would like to acquire a Sekonic L308, however I feel that it is criminally expensive for a piece of gear that has been on the market for 25 years, with no model updates since 2005.

The Tascam DR-100 was a welcome upgrade from the diabolical Zoom H4n which was barely capable of recording anything other than its own digital preamp noise. Though it has many fewer functions, the Tascam has three hardware preamp levels and concentric rotating input level knobs which mean that gain levels can be adjusted during recording. I’ve been able to make clean recordings outdoors with its built in unidirectional mics using a simple Rycote windjammer, setting the levels by meter rather than headphones. Since we have not used the Rode NTG-2 on this residency, the DR-100 is a bit of overkill in size and functionality, so I may look into acquiring a DR-05 for Sounding Out Spaces missions.

I’ve also been using other Leicas here at the Lab: microscopes. There are a selection of Leica imaging units at our disposal, such as the DMLB, EZ4 HD and a few other scopes with an MC170 HD camera that can be moved amongst them. I started using them after my second outing in the Tundra where I discovered pink blooms of algae in the remaining patches of snow. I gathered a sample in a film canister, and took some images with the MC170, then found a 2.5x camera adapter and ended up perching my GH1 on top of the scopes to get higher quality images. I am really not impressed with the quality of the Leica sensors, nor the computer interface. They are slow and clunky, with high noise and a minute dynamic range. Shooting RAW with the GH1 gave a much better quality image for stills, and yielded some absolutely superb video footage of Tardigrades and Rotifers. The optics of the microscopes do also seem to yield a significant amount of chromatic aberration which became particularly marked when I was trying to capture a clear shot of a mosquito’s Labella. I spent many hours exploring the microscopic fauna of a square inch of arctic moss, discovering thousands of monsters, and yet I continue to drink the unfiltered water which — incidentally — is the best water I’ve ever drunk.

Tobias Feltus:
Share

Testing shutters speeds with a dSLR

I’ve been using a method for testing shutter speeds is with a dSLR. This method only really works with really big shutters like the focal plane units in Graflex cameras. Extend the bellows (flip up the mirror if it’s an RB), take off the lens and any film back. stick your dslr on a tripod with its lens inside the bellows in the place of the lens board.

Point this assembly at something, turn off the lights and light that something and focus on it through the dSLR. Adjust your aperture on the dSLR to reflect the shutter speed that you are trying to test, and take a test shot with that speed on the dSLR. Then turn the dSLR’s shutter to 1″ and wind the Graflex’s shutter to that speed. Open shutter, fire Graflex’s shutter. Then compare.

I’ve found this method to be much easier than measuring an impulse and trying to compare microseconds to specific fractions of a second. On the dSLR you can look at a histogram approximate a percentage diffence in exposure. 10-20% is acceptable with black and white film.

Tobias Feltus:
Share

New55 Kickstarter

April was an interesting month indeed. The New55 Film project ran a Kickstarter campaign, and we got funded!

https://www.kickstarter.com/projects/bobcrowley/new55-film/posts/815387

Tobias Feltus:
Share

Seven, with Poppy Ackroyd.

A few weeks ago I shot this video with Poppy and John at the Witespace Gallery, in Edinburgh.

Seven from Poppy Ackroyd on Vimeo.

I shot it with available light, with the GH1 mainly handheld, wide-open with the Nikkor AF-D 50/1.4. I think we ran through the track four times, to make sure I’d have enough redundancy to make a decent cut of the track.

As per my usual, I edited in Final Cut Express 4.0.1. I decided to transcode the AVCHD footage to AIC for simplicity, and since I’d exposed the footage pretty light, I didn’t feel I would loos any dynamic range in this conversion. I think I was right, even though the whites did display some banding, both before and after transcoding.

The colour grading was done using free filters. To do this, I make a new Sequence, and slap the edited sequence in the new sequence’s timeline, and do all of my grading on this encapsulation of the editable edit. Firstly I increased the exposure with Image Control/Brightness. Then I used CHV/Silk and Fog, radio-clicked for “silk”: I used this to subtly make a little bit of glow on the highlights, which made the footage look a bit more filmic. I then used CoreMelt’s Pigment RGB Levels and Curves to adjust the exposure curve. This is – so far – the closest I have found a video filter to work like Photoshop’s curves, though it is still limited. I then converted the image to B&W using TMTS Color’s Black & White, which gives you a good RGB mix in the monochrome conversion, so you can make skin tones look smooth.

I’m quite pleased with how the high-key look came out, using only available light and manual controls. If you use Final Cut, you might as well download these free plugins, as they do seem to perform pretty well.

And of course, look out for more from Poppy HERE.

Tobias Feltus:
Share

Using your hacked GH1 with Final Cut Express (and fighting colour shifts).

Working on the music video for Herself‘s Here We Are was the first time that I attempted to streamline my hacked GH1’s workflow. Since my struggles dragged out into several days of trial and error, I hope that my findings will be helpful to others.

I chose to shoot the video in AVCHD 1080p50 because my current firmware produces ridiculously heavy MJPGs which have an excellent dynamic range, but are not practical to work with as I can only get just over 3 minutes’ footage on an 8GB card: limitations which remind me of Super8. So, my AVCHD *.MTS files seem to have an average bitrate around 14mb/s, similar to the original settings. I also choose to work with Final Cut Express 4, as I own a copy and am content to make fun things with the pauper’s tools.

The camera was set up in front of tungsten lights, with a lovely Zeiss prime. No fancy CP or ZF glass but rather the cheapest prime on the market, the M42 Tessar 50/2.8. Frown? No, it is one of the sharpest pieces of glass out there, and can be picked up for the price of a couple of pints of beer. It was never favoured as it is not particularly bright, but if you don’t intend to shoot at a wide aperture, there is little point in spending a fortune on something only just as good. The video was shot at f5.6, focussed at 0.7m.

So, the first thing that you need to do is follow this link, and download Panasonic’s QuickTime plugin. This will allow all of your software to read the camera’s *.MTS files without the need to transcode them (so yea, don’t ‘log & transfer’ the footage in Final Cut Express). The plugin gets installed in YourDrive/Library/QuickTime (not your UserName’s Library). You will need to restart your machine before it becomes accessible. Copy the AVCHD folder from your card to a hard drive and call it something like “avchd archive”. The folder structure of AVCHD is a bit confusing, and is apparently a playlist of individual files, which only becomes handy when you have clip lengths that create files over the maximum file size limit of a FAT formatted card. So everything you should really need is contained in AVCHD/BDMV/STREAM, and all the files will have a *.MTS suffix.

Now, I decided to convert my *.MTS files to ProRes 422 HQ using Streamclip (which you can download for free
HERE)
. After editing I did find that I could now just use the *.MTS in Final Cut Express’s timeline, and I am not sure if there is a disadvantage to doing this. The reason why I started exploring these codecs is that my initial import, Logged and Transferred in Final Cut into its Apple Intermediate Codec, looked washed out and varied in tone when I exported the edit from Final Cut. ProRes is a Quicktime codec which you should be able to find on the internet; the main download from Apple (here) appears to require one of their ProApps to run, but I shall leave this detail to you, if you need it.

I found that editing the footage was smooth. Both the ProRes, Apple Intermediate Codec and raw *.MTS files will play smoothly without the need to be rendered. I did a tiny bit of grading before exporting, but found that no sharpening was needed, as it destroys that film-like quality that you can get with a good lens. The main issue I had was with the low quality of the native Apple Intermediate Codec which was perfectly good for HDV footage, but seems to loose a lot – especially in the shadows – with my current setup. Assuming that the quality of each of your clips is the same, I do the grading by making a new Sequence, and placing your edit on its timeline, then applying your filters to this new Sequence.

Apple Intermediate CodecProRes 422 HQProRes 422 HQ

ProRes 422 HQ

Ranting Addendum: I still feel that many of aspects of working in time-based editors (audio and video) are kept in a manner to preserve the talents of old practitioners, and keep their ‘secrets’ magical. For some reason I was unable to find any tutorial on exactly what I was trying to do, and colour grading in Final Cut Express bares almost no resemblance to how one works with an image in Photoshop or Aperture. To me the important thing here is to have a clear ‘vision’ of what you are after, as tinkering can be slow and clumsy. When you are happy, you then need to export a ‘Master’ file. Now, one often debated issue with any image editing is monitor calibration. Since the output of most of our media will be online or on a DVD and a TV or projector, using a “broadcast” calibrated monitor really should not be an issue, as each output device in the future will be different. Ideally you want your monitor calibrated, so that you are happy with the way that things look in a “correct” manner, and hope that future viewers’ displays are close enough to also be good. Forums are littered with ‘pros’ saying that only broadcast monitors can show the right colours, to which I raise some fingers. Of course they have an opinion, but what are ‘real’ colours? the only time they exist in digital photography is in the interfacing between display and print. There is no right and wrong. The LaCie display at the lab is calibrated to reflect the Epsilon’s print output accurately, and that is all that matters. I can’t get mine to match the lab’s, which also does not really matter, as final proofing is always sone on that display.

Now that my rant is over… Final output is, once again, a big issue. According to what I have found, there are differing gamma settings between Final Cut’s canvas and QuickTime, etc. I was able to get my ‘Master’ export to look like the Canvas by exporting it in ProRes 422 (again, an AIC export shifted drastically in colour), however it took a lot of work to figure out how to compress the ProRes file for web use with the same colours. I can’t reinforce how important it is to make multiple saves – at this stage – as something went wrong the other day and I did loose a lot of work on the grading of the video.

The solution I have come to is the following:
1. Calibrate your monitor – I used my Spyder 3, and went for a ‘normal’ setting of 2.2 Gamma and a white point of 5000k, as this is what I normally use for print output. Using this, do your grading visually in Final Cut Express. Despite the fact that calibration for web-output shouldn’t make any difference, it does give you an input colour profile to work with.
2. Export your Master as ProRes 422 HQ. I left the audio settings as AAC 44.2kHz 320kbs HQ. In the Filter field I set colorsync with my current monitor profile as the input, and sRGB as the output. This gave me a very close match.
3. Using QuickTime’s H.264 encoder just seemed to not work. I have the feeling that the encoder is designed for ‘normal’ colours, and hence that it will change anything else erratically. After several days of mucking around and being very frustrated, I found this blog which recommends using another QuickTime component called x264, which you can download here. Again, this gets installed in YourDrive/Library/QuickTime. So now you should be able to open your ProRes master in QuickTime Pro, and export ‘Quicktime as Quicktime movie’, setting the encoder to x264, and limit your bandwidth if needed. I found that this, finally, produced good colours. Remember to check in the Settings of the plugin that you have the correct framerate, I ticked the Add Gamma 2.2, and b-frame to Optimal, and Use 3rd Pass.

During the compression nightmares I wondered whether I should have spent the £35 and bought Compressor: economically it would have been the cheaper option, but now maybe I have written something that can help someone else save the cash. Never having used Compressor, I don’t know whether it would allow me to preview the output accurately and, most importantly, change what parts of the image are compressed most heavily. Despite the fact that digital video is now even spooled to us on our TV, h.264 compression is good, but its dynamic range is not really able to display colour gradients in a smooth manner. All of my work is subtle, and often dark: frustratingly I think this makes me more prone to noticing the rainbowing in gradients and the blocking of shadows which – probably – no one else will care about.

The video of Here We Are can be viewed HERE.

Tobias Feltus:
Share

Piazza Camera, kamra-e-faoree, or that which is kind of Polaroid and kind of darkroom.

A few years ago, my father bought me this curious camera at the street market in Pissignano (TR). He remembered having been photographed on a similar machine when he was a teen, maybe in Naples or Rome, but we were not clear on how they worked. Deduction showed a lightproof storage chamber, a long sleeve, a very crude shutter mechanism, what I thought to be a printing-out window at the top, and two vertical chemical trays in the bottom. What he remembered was that they were used by photographers to take street portraits of people, and hand them a print just minutes later. And hence its vague connection to Polaroid. But the similarity ends there.

My reason for writing this, is that I just stumbled upon this website, which has a wonderfully comprehensive study on the use of these cameras in Afghanistan. The site explains how they work, and also has an extensive collection of photographs taken with them, and of them in use today. It even has an eBook to download, which explains how to build one. It is hardly worth noting, but the authors of the website do specify that the Afghani street cameras have an internal focus mechanism (moving the paper negative to and from the lens), as opposed to having a bellows, like my camera, to focus in a more typical manner.

The use of the kamra-e-faoree is hardly practical – by our modern expectations – but nonetheless wonderful. In principle, a photograph is exposed onto silver-gelatine paper. The paper negative is then developed and fixed within the darkroom of the camera body, and placed on a stand at the front of the camera where it is re-photographed, to produce a positive (again on paper), which is developed, fixed and then rinsed in a bucket or fountain.

Though the Afghani cameras were predominantly used for ID photographs, the process they use is identical to that of the European tourist cameras: a system that I imagine has been in use worldwide, but seems to have slipped past most of our knowledge, and is not mentioned in any book that I have ever read on photography.

Somehow this process seems both more romantic and more practical than those predatory snappers who plague tourist traps with cameras, and hand you a card offering you prints the next day from their studio (though I don’t know if this still happens, as I have not been a tourist since the advent of digital photography).

Tobias Feltus:
Share

X-Synch on the Graflex RB Super D

I was puzzled that the internets seems to have no information on the Super D’s flash synch. I posted on Graflex.org looking for some insight, but ended up – eventually – investigating the system myself.

The result? Yes, you can use electronic flash on your Graflex RB Super D! How? well, simple. Using what some folk call “drop curtain”: what this meant was obscure to me too, but I worked it out. The shutter on the Super D gives you speeds from 1/30 to 1/1000, however there are two other speeds which you can obtain: if you lock your mirror down, and roll the shutter curtain to “O”, when you release the shutter, the mirror flips up exposing your film, then the shutter closes. At the lower spring tension you get approximately 1/5, and at high spring tension you can obtain 1/10. This is brilliant, isn’t it? Yes, but even more so when you consider that these two speeds can also be used with electronic flash, as the flash contacts close when the mirror completely clears the film gate!

However my bi-pole sync port was not working…

Disassembly:

To get at the mechanism, you need to remove the shutter plate (where you set the curtain aperture and flip the mirror). Before taking off the plate, I would suggest removing the back (remember there are a few hidden screws that you can only access with the back partly rotated), so that you can use a (white) pencil to mark the position of the upper lip of the shutter curtain on “O”. To remove the shutter plate only four screws need to be removed, but you also need to extract the pin that is on the mirror shaft. This took me a couple of weeks, and I ended up using a microjet torch (the variety that takes a butane lighter inside, and burns up to 1300c with a tiny sharp flame) to heat up the metal locally, just enough to be able to tap the pin out. The concentrated heat seems to not cause any problems, and with a few seconds was just enough to loosen its grip. Be careful and gentle – don’t force anything. Then remove the four screws (one may be flat-headed), and the shutter will close. Don’t panic.

Repair:

What you will find is that the actual mechanism of the Super D’s shutter is remarkably compact and simple, and that the flash contacts themselves are little platinum or silver tips like what one would expect inside a motorbike engine’s distributor or a relay. Give everything a wee clean. The leather will probably have a bit of greenish waxy oxide on it, and some dust. The flash contacts are very easy to adjust, but I would start by spraying some contact-cleaner or switch-cleaner into them, and maybe fiddling a bit of paper over the platinum points. The reason why my flash was not triggering had to do with the “thumb” at the bottom-right of the shutter mechanism. The thumb is the spring-loaded part which is meant to close the contacts when the mirror hits home (and the contact itself is on the small leaf-spring, bottom-centre of the picture to the right). Said this, it also appears to be held in place with a tin-plated screw which has oxidised over the past 65 years, and hence become a bit stiff. So unscrew that, use a dry brush to clear off the oxide, then I added some PTFE lubricant and reassembled the thumb. Check that all of the other moving parts are free. I added some PTFE to a couple of the other pivots, and cleaned the dry grease from the upper curtain roller bush. Make sure you did not get any lubricant on the flash contacts (or clean them again), and check that the gap is good: connect an ohmmeter to the contact prongs, and rotate the mechanism to make sure that the thumb is closing the circuit, and that it is opening again. If you need to adjust it, you bend the upper contact by a hair, using a screwdriver or something (it is very malleable/delicate). It is also worthy of note that the flash timing would be adjusted by the shape of the thumb, but it should be right, so don’t bend it.

Reassembly:

Once you are satisfied that everything should work smoothly, rotate the curtain key until the “O” is centred in its window again, as you are likely to have wound the gears way past its correct positioning. Make sure it is centred, and not just visible. At the back of the camera, wind the curtain up until your pencil marks match. Try using something like masking tape on the ribbons to hold it, probably just above its marked position, so that you have enough play to mesh the gears. Place the shutter plate onto the two pivots, and wiggle it until your gears mesh, place two screws to hold it tight, then untape your curtain, and check that it holds with your pencil marks matched up. If they do, then try running the shutter at its different gaps to make sure they are all correct (as in they start with the gate closed, and end with the gate closed). Replace the other two screws, position the mirror lever and replace its pin (which may not be easy). Replace the rotating back.

If you are lucky, you may have some kind of a cable which plugs into the two-pronged flash port. I did not. So I had to make an adapter. I made the contacts out of a figure-8 connector, which i covered in heat-shrink tubing, soldered on a PC socket, and then caked the lot in Milliput® epoxy putty. I put cling-film in the socket first, so that I could get my putty out when it had cured (this works well), and then I filed and sanded it back. Some day I shall get round to painting it black too.

In conclusion, this solution makes the Super D one of the most ductile large-format portrait cameras, as you can look through the lens without the delay of then closing down the shutter to load film. Though the Super D has automatic diaphragming for its own three lenses, I only have one of these, and plan to modify the front standard to take brighter lenses like the Dallmeyer Pentac 8″ f2.9, and being able to use electronic flash with these lenses is quite an unusual privilege.

Tobias Feltus:
Share

PocketWizards: How to buy them second-hand.

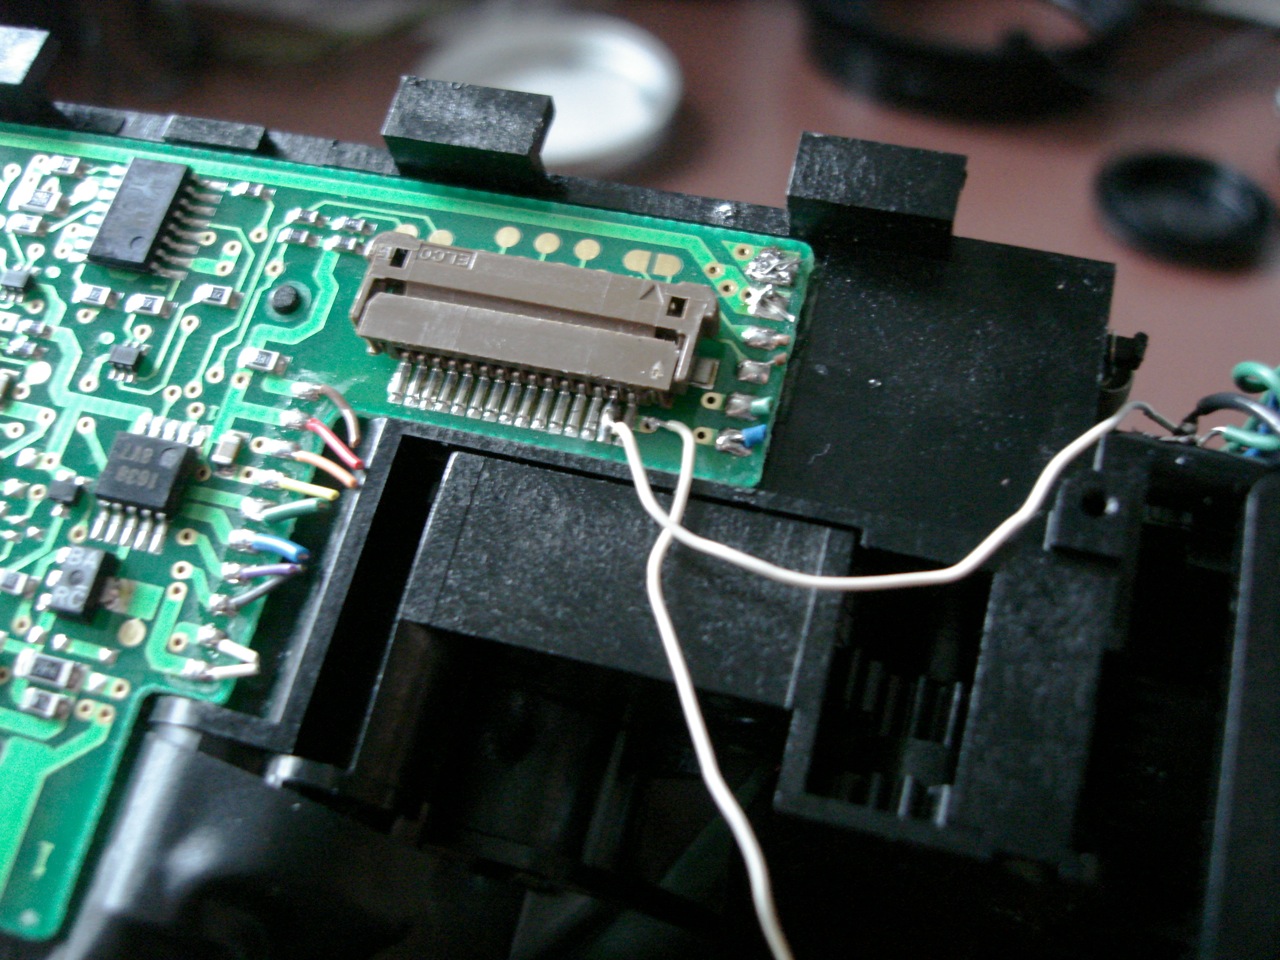
I was surprised to find that there are no instructions on the webbyweb for the purchase of second-hand flash triggers. I have been using a set of “cheap Chinese” radio triggers for years now, but they are on their last limbs, despite having given trouble from the very start. What kind of trouble? I think the very first shoot I took them on was with Aereogramme in the basement of the Classic Grand (Glasgow); I had three Metz 45 strobes, and had intended to light the hall so that I would have had nice sharp pictures. The band was all on edge, as it was before their gig and, well, so was I as only one of three receivers would trigger. In retrospect I wonder if the Chinese triggers were running an FCC frequency (see explanation below), or whether there was some strange RF interference in the basement, but it remains that the pictures came out shite because the gear failed.  Subsequently one receiver died completely, and the others have managed to destroy other gear, such as the beloved PC-cord for my Vivitar 283 which, of course, was the only flash I had in my bag when I was shooting the green bathroom shots for Violence Was Offered, which forced me to shoot it with on-camera flash.

The solution is one. New triggers. My friend Victor has been trying to persuade me to go with his design of optical slave which, accordingly, is very reliable even in daylight. My reluctance is twofold here:

With my Bowens optical slaves I find that the smallest obstacle, even indoors with white walls, can often mean that I can’t trigger a second flash, so I have little faith in optical slaves. And by smallest obstacle, I mean the actual light modifier.

I don’t fancy being caught out in yet another DIY project that is unreliable and unsightly just to save some money that, ultimately, is not saved, but rather just a waste of time. I am not an engineer, and my facilities are limited.

So I decided that maybe I should invest in a set of PocketWizards. Even the original Plus system would be good. Since I have already had problems with this plan, I thought it worth writing up a blog to someone else out.

Why PocketWizards? As far as I am aware, there is only one player on the market who is selling a radio trigger system worldwide which is compatible with itself and other devices. What do I mean? When I got the Chinese triggers a few years ago I had not even contemplated the fact that after I had purchased the bits that I had, I would not be able to add to the “system”, as I would never be able to find a compatible device with the original set I had bought. So they are out. Other “real” companies such as Bowens, Elinchrom, Quantum and a few others have released their own radio triggers, but often they are single band and compatible only with themselves. With the Quantums, if I recall, they made four frequencies, and you had to buy that one frequency for compatibility, which is limiting as they are incredibly hard to find. I hear of other newcomers such as Cactus, Radiopopper and Phottix; the latter seems to come in a CE version, but the first two are not even marketed in Europe, and I have no idea what their pedigree is, nor what their company security is. So in essence, Pocketwizards seem to be the best investment, as they are the most likely units to continue to work, and continue to be compatible over time, as well as being rumoured to be the most reliable manner to trigger a flash. They also have the great advantage that all of their models (I believe) are compatible with each other, so you can get an older Plus (separate Transmitter and Receiver units) and a newer Plus II (Transceiver model), and their 4 frequency bands will work together. This is a great advantage.

What to look out for: The stuff that no one else bothers publishing on the web! Radio frequencies are used differently across the globe, and certain bands are open for civil use in each region. Of course, my friends, the USA has its own bands, and Europe has others. Why does this matter? simply because if you use an American radio trigger in Europe, its frequencies are within the same band as our beloved mobile phones, so as you get a text, all your flashes will go off, and when you try and trigger your flash your neighbour might misunderstand his lover deep in conversation on how to carry on with their covert fling, rather than your flashes firing. Frustrating. And on a side-note, I think it is also illegal.
So where did I go wrong? I found, on eBay, a set of one Plus transmitter and two receivers at a good price: I pounced despite the seller not knowing whether they were the right version for Europe, and of course I could not establish this because there is nothing published online about how to distinguish the versions. So I wrote to PocketWizard, and got a rather prompt response:

“The quickest way to determine if a Plus radio is FCC or CE is by looking at the side near the power switch. CE radios have a large CE icon, whereas FCC radios have a small FCC logo or a string of text that starts with FCC. All of our radios, including the FlexTT5, MiniTT1, MultiMAX, and other receivers and transmitters have one of these symbols on the side or bottom of the radio.”

I wish that this was information that was simply published on their site. And to clarify, FCC is the USA system, and CE is the European system. I believe the classifications may also be legal in other parts of the world, but this does not interest me right now.

In conclusion, I am still triggerless and hope that, eventually, I will either find a set of CE Pocketwizards at a good price, or be blessed with the opportunity to be able to afford them new.

*UPDATE*

The other day I got Calumet’s catalogue, and in it I discovered that they now have their own Pocketwizard clone, the Calumet Pro Wireless Transceiver. To further this, I find that there are possibly other clones, including the new Interfit Titan Pro and the Phottix Atlas. The thing is, I have no idea whether they are truly compatible. My worry about buying anything other than a PW has been the product longevity, but if one of the cheaper units is compatible with PWs, then it becomes a viable option and, at £150 for a pair, the Calumet Pro Wireless Transceiver costs half as much as a Pocketwizard Plus II (though Amazon.co.uk is listing CE PW Plus II units at £99.99, all of a sudden, as well). So I called Calumet to confirm that these units are compatible, and the chap claimed that their unit will work with a PW, but that its range is inferior. As for the other units, all I can see is that they look the same, and some reviews claim they are the same hardware branded differently, which would suggest that the Phottix is the ‘original’ which Interfit and Calumet have re-branded.

My Calumet Tranceivers arrived yesterday, and I have not yet had the chance to actually use them, however I have already found some very good things about them. Boxed, they come with good quality accessories, including a gold-plated PC cord, a cold-shoe for placing the unit between the camera and a hotshoe flash (Which I assume would also isolate a high-voltage trigger from the camera), and the overall build quality is indeed superb. As for their range, one thing I am sure of is that their range is far greater than a wireless-N network: My flat is small, but has several walls, and even a new N router is not strong enough to have the internet across the whole flat, so I have two routers doing this. However the trigger is perfectly happy to trigger a flash through all of these walls, and without the antennae even pointing upwards. So far, this is fantastic, as I shall never need to trigger a flash through several walls, and the old triggers often would not fire in the same room. Another important feature which Calumet does not bother  to specify is that they can handle a sync voltage of up to 400v, meaning that they should be safe with pretty much any electronic flash of any age.

I have now placed an order for a twin set of Calumet Pro Wireless Tranceivers, and I shall update this blog once I have tested them thoroughly. I think, however, that the conclusion is not to buy used PocketWizards, however I have, at least, put in writing how one can establish the frequency of a PocketWizard.

Tobias Feltus:
Share

Hassy and Diana get close.

I was wondering: is it reasonable to compare the Diana F+ to the Hasselblad 500c, or is this another foley comparison like the Barbie Videogirl versus Canon 7d? I am not sure either. The thought of writing a comparison came to mind after my posing for Victor Albrow’s series on hair, where I sat in front of his Hasselblad H2-39 and failed to understand how it was thirteen times better than my 500c + Imacon Flextight Precision II, a combo which even contains the same brands of technology. Yes my Precision II takes a while to get its 50megapixel out of a 6×6 negative, but my 500c does expose its negative at the instant that I release the shutter, whereas the H2 seems to take over ¼ of a second to do this crucial task. Curious indeed.

So, the other evening Sophie and I decided to take some pictures, and I decided to compare the Diana F+ that I had bought her to my 500c. The Diana had its 55mm+Macro lens, and I had 31mm of extension tubes behind my Planar 80/2.8. The focusing distance is rather similar as is the field of view (though this is something that only became apparent after developing).

The comparison may seem ludicrous as the Hasselblad has been one of the staples of professional photography for over 40 years, whereas the Diana is considered a “toy” camera, and has been for almost as long. However, in a day and age where most professional photography is executed with digital cameras the two analogue machines live on an analogous playing field as artistic tools, and their market values are not too far apart now either, despite the Hasselblad’s myriad of features compared to the Diana, even if one is just counting things like different shutter speeds as a feature, the Diana has a cult status which the Hasselblad seems to lack. Though in this test the only feature that gave an advantage to one camera over the other was simply the fact that the reflex meant that we could actually see what the Hasselblad was focusing on and framing, an issue that could easily be overcome with something like the Leica BOOWU macro stand (a set of legs that distance the lens from its focal point, with four legs providing a field of view). So in practice what did this mean? In framing, the Diana was guestimated, using a piece of card, 15cm long, to gauge focus; whereas with the Hasselblad there was a frustrating dance of breathing and moving back and forth to find the focal point and hope to hold it long enough to release the shutter. So in practical terms the Hasselblad was slower to use, but had a greater likelihood of being in focus. From a creative point of view I would argue that they were on par, however, as their pros and cons weighed out equally.

So do I have a conclusion? Of course there cannot be a logically technical conclusion, however I can be firm in the knowledge that I do prefer my 500c to what I saw in the H2, and that I also believe the Diana F+ to be better value for money than the current top of the line Danish / Swedish / German / Japanese machine.

Tobias Feltus:
Share

Instax 100 with a manual twist.

A few months back I got round to hacking an Istax 100 to pieces and reassembling it with manual focus, shutter and aperture. Despite having posted almost nothing, I have got a lot of interest on Flickr, then Georg (Polapix) made his own version from my notes, and I thought I might as well write a wee bit about it.

a PhotoBooth snap of myself with the beast

I had originally wished to keep as much of the original Instax as possible, and just replace the shutter and exposure unit. I failed at this whilst trying to identify the flash trigger. I think the flash uses an IGBT chip, or is rather overly sophisticated for the camera. Also the flash control board seems to be combined with exposure and shutter control. Odd design, as usually even on digital compacts, from my experience, the flash board has been separate. Even in a Nikon SB600 the inverter board is separate from the control board. So, yea, trying to identify the trigger I ended up loosing all of the electronics within the Instax, blowing a couple of components.

But all was not lost. The barrel was not rigid enough to move the weight of the tiny Vaskar 105mm anyway, so it is best to have it glued in rigid.

I believe the Instax 100 is a simpler chassis design than the later models, from what I gather. So, the microswitch which I have
drawn in my diagram is at the bottom and back of the camera, on the lowest gear in the drive mechanism. it fits into a cam to break contact. what I have written as “shutter switch” I then re-wired through the bus to the PWR button, the red one, on the back of the door, as the eject, as I thought there was less of a chance of me hitting it by accident. Again, I identified the bus contacts by ohmmeter, and just use the lower circuit board to for the bus contacts. So the red button initiates contact, and the cam closes the circuit, continues its cycle, then breaks the circuit once the film is ejected. I would recommend that you don’t solder onto the bus contacts, as I did, as things are too small, and a bump later shorted this out and ejected half a pack of film. So look for larger solder points on the board, if you plan to use this switch. obviously using the existing shutter button would be easiest, as it is large and already has wires coming off of it. After I blew the main circuit board i just cut all of the wires connecting the boards to the battery, to avoid any issues. The diagram and notes are in this scan of my Moleskine. The camera is a bit of a hassle to use, as it is a clunky machine with a rather small viewfinder, however it can be used with studio lights, and does produce images. Below is one example.

And here are a few more images of the camera in parts:

Tobias Feltus:
Share

New55 Project experiments (or shall we call me N55 North?)

Bob Crowley and I have been working on the New55 project for well over a year now. I forget even when it started. His blog has been visited heavily by eager fans of Polaroid Type 55, and criticised widely by some less-grateful citizens of the photographic community.

So how far have we got? Bob made the initial jump, by creating a first monobath reagent. He chose Kodak’s HC-110 as a developer base, as it has a long lifespan. He was using Ammonia and Ammonium Thiosulphate to boost pH and fix, but I got poor results from his mixture, and could not stand the smell, even with a respirator and ventilation (yes, my workshop is also the kitchen, so this mean the window and balcony door being open). So now that we knew it was possible to process a 4×5″ B&W neg in one pass, I moved on in my own direction. My first aim was to make the soup odourless, so I moved towards Sodium Thiosulphate and Sodium Hydroxide. My 8th mixture is what I started calling Reagent 4 beta 8, but now it is just R4. In under 5 minutes at 20c I was able to obtain negatives from Efke PL25, rated at 25ISO, that had a density and balance that is close to the delicacy that we like in T55. I was pleased.

The next step that Bob had been making over in Boston at the N55 “labs” at Soundwave Research were in assembling prototypes of pod-developed film to be field processed in a Polaroid 545 back. So I tried to figure out what the minimum amount of water needed to dissolve the solid chemicals in R4 was (not easy for a trial and error chemist like myself), and then added some Methylcellulose to the mixture to thicken it. I had made up about 2 35mm film canisters of reagent, and popped them in the film fridge. My first test was rather spartan, taping black paper and scraps together in a changing bag.

So what we have here is a control image developed in HC-110 dil-B as per normal, then a similar exposure (I was exposing 4 sheets at a time for tests) from my kitchen window in R4(b8), followed by a composite of my first p/n pod processed test (using fixed-out MGIV paper as a receiver), and finally the test that I did last night: the goop has been in the fridge for over a month, but my getting a heat sealer meant I could make pods, so I had to give it a shot, and it seems to work just fine. I taped things together in the changing bag, and using electrical tape as a light seal means that it has a tendency to buckle and thus break even contact between the surfaces. Oh well. But it proves the validity of my R4 even as a pod processed p/n. I can’t tell if the apparent contrast is to do with the concentrated chemicals, or just the fact that the chemicals were ‘mottled’ on the surface of the film, thus developing unevenly. The image was stable when I peeled it apart, but of course the anti-halation was still there, so i popped it in some fix to clear this, which is also less hassle than the Sodium Sulphate to clear T55 goop.

Now to order some Shanghai 4×5, get some receiver from Bob (via the 20×24 studio scraps corner), and some other bits, and I am curious to try and work with an all-raw chemicals mixture too.

Tobias Feltus:
Share

Graflex RB Super D: converting the back to take “standard” accessories.

Finally, after a couple of years lusting after one, I have a Super D (thanks to Bob Crowley and his find). It is in very good condition, in fact, almost new, and hardly used if at all. The only issues were need for a bit of lube in the shutter, and some minor cosmetic issues (like the leather coming loose on the lens door, due to retraction). However the Graflex standard back is not too useful today, or at least, it is not much use to me, as I want to use some Polaroid, and a Grafmatic sheet loader. The normal approach to this adaptation seems to be along the lines of what Bob did with his, involving taking a Grafloc back, cutting it down, and gluing it into the RB’s back. But I saw little point in this as Grafloc backs are expensive, to me, and also there is little need for a springback on a reflex camera.

The differences that I found in the Graflex back are:

the accessories are 6.5mm wider than the international standard

the accessories do not have a light trap lip sticking out, but rather a recess in them.

So, I had to shim the whole plane of the mount up by 1mm to create a groove to accept the light trap, and move in the tongue sliders. For most accessories they are fine the way that they come, however my Polaroid 545 back has two slots in either side, so I had to cut my sliders into the typical two-eared shape. I did this with a dremel and files.

But from the start, clean everything up, and the edge of the tray needs filing back by about 1mm so that it sits flush with the new raised level.

I then cut a piece of 1mm black styrene that I had to fit, and cut out the slot for the light trap. Then I glued this in with contact adhesive. The component has no structural value nor requirements. Then I drilled out and countersunk all of the necessary holes, including four new ones to move the lower screws that hold the slider supports in place. They had to be moved 3mm in, so I moved them diagonally to avoid weakening the frame. The slider bar supports are made of mahogany with brass inserts. To move them in the necessary 3mm I cut thin strips of 3mm plywood and glued these into the existing rebate with aliphatic resin, but any good PVA will do the trick. Then I primed and painted the brass tray with the new plastic shim, and the enhanced supports.

Re-glue the felt onto the base of the tray (cutting 4 new holes where the new screws go), and reassemble the base and rotating components. Screw the slider supports back in using the same screws, and reassemble the whole caboodle.

The last thing to do is to shim the ground glass and fresnel assembly. I just used two thin strips of the same 1mm styrene, as this was the only change in the focal distance made.

And now I have a Super D which can take all manner of film holders, including Fidelity double darkslides, as they are grooved on the side so they can be gripped by the sliders.

Tobias Feltus:
Share

Monobath R4, Lani Irwin and Alan Feltus

I have been experimenting with monobath processing for a few months now, as part of a research project with Bob. His R3 used Ammonia and Ammonium Thiosulphate, but I found the odour levels too much to work with, so I developed my own R4, which is currently in its 8th incarnation, and is odourless by using Sodium Hydroxide and Sodium Thiosulphate. Since I am no chemist, the whole process has been rather fun, and involved my adding more of one and less of another component until I started to get results that I like. Since the aim has been to get close to the ease and quality of Polaroid Type 55, I made adjustments to my monobath until I got similar midtones.

The other evening, just before my parents left Edinburgh, I took a few shots comparing T55 to Efke PL25 in my R4, and the results are most pleasing.

On the left you see the Polaroid Type 55, and on the right my monobath test, then below the FP100c45 and the DTR positives from the T55. I think the slight difference in density is more due to the 1/3 stop speed difference of the stock, as I was unable to adjust exposure that little on my Pacemaker.

These were shot with the Dallmeyer Pentac 8″ f2.9 (interesting lens).

My current monobath uses HC110, boosted in PH, buffered and fixed, also with a buffer. the PL25 was processed for 5′ at 20c, but the process terminates before that time.

Tobias Feltus:
Share

Retouched Beauty.

Rasmus called me a few weeks ago, as he had a uni project to make a 2:20 documentary, and he wanted me to talk about retouching. I think the piece works decently, and it is poignant, today, to point out to people that “photoshopping” has been a part of photography since at least as early as 1852, and before that, beauty was tweaked by painters and sculptors for millennia.


Retouched Beauty from Rasmus Clarck Sørensen on Vimeo.

Tobias Feltus:
Share

Making of Gamma 2.9

I decided to make a new “making of” video, this time I think I made it a little more pretty, though I am still using the on-camera audio of the GH1, and editing in iMovie ’09, simply because it is a fast way to do things, and syncing audio would be difficult. Anyway, I hope that you enjoy the video. What I hope to do with this, or these, is remove the magic from creating an image, or rather, remove the fear that someone might have from creating a good image when faced with a mental image. Part of the suggestion for this kind of lighting comes from my (late) grandmother, and the two studio shots I have of her:

Anne Winter - examples of photomanipulation from the 1930s

And it is still good to remember that a 57 year old Hasselblad 500c is as capable of anything currently on the market.


Gamma 2 (making of) from Tobias Feltus on Vimeo.

Tobias Feltus:
Share

Making of Potatoheart

I forgot to post my “making of” video for Potatoheart, for some unknown reason. Please do accept my apologies, and enjoy the odd ramble here. I promise to make future videos a little more sophisticated.

Tobias Feltus:
Share

Polanegs

So, a few of us have been experimenting with what I call Polanegs, or rather the extraction of a useable negative from Fuji FP-100c instant packfilm. I really like the odd quality that I am getting now, so here is my process, which is a slight evolution of Bob’s process which was an evolution on my advancements from this.
So, you shoot your “polaroids”, and set aside the discarded back to dry. I just set them out, then stack them. It is important to leave the processing “gunk” on the surface, as this helps to protect the emulsion during the processing.
Then, get yourself a sheet of glass and some tape.

Then tear off the papery bits from the top and bottom, and lay the emulsion down on the glass, and tape each one down completely around the edge. the idea is to form a watertight seal around the edge, but covering as little of the black side of the neg as possible.

Then to the wet area, in my case the bathroom. I use “Thick Bleach” as I found that the gel quality to it seems to destroy the black coating much faster than normal bleach, plus it does not run as much, and thus is less of a threat to clothing. But at this stage, of course, wear some form of protective clothing, and maybe a glove or two.

Now, onto each, I kind of squeegy a bit of bleach over each image, trying to keep an even coating a couple of millimetres thick, or whatever Archimedes dictates.

I then tend to wipe it around a little, to make sure the black is dissolved. We still have not figured out what the black is, and also do not know why bleach seems to be the only thing that dissolves it. But we have tried lots of chemicals, and this is the only one that seems to work.

It seems to only take a few, maybe 30, seconds to do its work, meaning that it can now be washed off. I just use the shower head and COLD water. Hot water is likely to soften the tape, which we don’t want.

Now, peel off the tape, and de-gunk the emulsion side, and remove the remaining bits of paper. I do this with a piece of cotton wool and hot water. The emulsion seems to be surprisingly robust.

And you will be left with something like this… At which stage, either use PhotoFlo or just plain dishwashing soap, a couple of drops in a small tray of water, and then hang them up to dry.

And then Scan… Muck about with standard profiles, I think this started as a Konica negative profile, and tweak it a bit, and then you may get something pleasing indeed.
Tobias Feltus:
Share

Speed Graphic 1: The beginning of an overhaul.

So my plan, at present, is to strip SG1 down, and see if I can rebuild her into a modern machine, or rather, a machine that is better than anything currently made. I do not intend to re-invent the camera, nor re-design the Speed Graphic, but there are a few issues that I do wish to address and improve. So I am also not planning to restore the camera, but rather re-build her. And my hope is that, if I get it right, I shall be able to rebuild these for other people, in a similar manner to the way that the Byrons are marvels of a camera built out of a completely obsolete Polaroid Pathfinder. SG1, however, is a late (circa 1945 – all black) Anniversary Speed Graphic.

This all should be possible, in my mind, since I do have degrees in furniture design, and have a fair amount of experience working with wood, metal and cameras.

First off, I removed almost every screw from the carcass and bed, then proceeded to the removal of the leather and animal skin glue. Yes, the glue used is probably a rabbit skin, and it is likely that this is also what holds the finger joints together. Thus it is removed with hot water, and no solvent.

But first, to get the leather off and cause as little distortion of it as possible (to make a pattern, later), I used a dental tool to nudge it off the surface of the Honduras Mahogany (kind of extinct).

This is the leather sitting on the balcony next to the carcass.

And this is the desk with the parts of the machine dismantled.

The carcass after I removed the glue…

And this is it laying with the bed, now also de-gunked, out to dry.

The next stage shall be repairing the actual timber, and re-finishing it in a cellulose lacquer.

Tobias Feltus:
Share

Making of with Atzi Muramatsu

www.myspace.com/lipyncforalullaby

Tobias Feltus:
Share

Making of: Potatoheart

So, in response to Rachel Rayn’s request that I make more how to videos, I made a little one for you to enjoy, on the making of the potatoheart.

Tobias Feltus:
Share

Why I like the Aero Ektar.

I know that the Aero Ektar is not the most ductile lens, but so far it seems to be the biggest piece of opitcal magic that I have ever played with, and its wide availability makes this pretty democratic. So in 90″, this is why I like it:

Tobias Feltus:
Share

Why I like old lenses…

I had to have a wee stab, a wee stab at those who think that one lens can do all. That the newest glass is the best ever made…

Tobias Feltus:
Share

GH1 firmware hacking.

I guess I waited for a pile of other folk to test this, before I went for it. But even now, even after Philip Bloom did his tests, I still have little understanding of what the numbers mean.

So what have I gained? I no longer have a recording time limit imposed by EU regulations, but rather one imposed by the FAT filing system max file size of 2gb. Bumping up the bitrate of the video recording has had a massive impact both on the dynamic range of the image, as well as the file size, so I am now limited to a few minutes in the hefty MJPG format, however I can also capture the full range of greys on a Kodak grey card with little effort. Here is an example:

And here is another wee thing showing what the increased range can do. Annoyingly I spent many hours trying to export this without loosing my shadows, and failed with all codecs. So the raw footage is still far superior even than Final Cut’s Intermediate Codec can handle (what does one do with footage from a RED?)

Music is by Lipsync for a Lullaby: www.myspace.com/lipsyncforalullaby

So, in essence, yes, it is a rather amazing thing to be able to turn footage that was already miles superior to that of the Sony HVR A1e into footage that seems to out-do my copy of Final Cut Express 4.

More shall follow….

Tobias Feltus:
Share

Take it apart or take it to fix?

I have always been a fool when it comes to screwdrivers and spanners. My mum tells me of how I dismantled a typewriter when I was three. and from there, well, I have done many things that I should not have. Over the years I have got better at it, and slowly the success rate of my tinkering has increased. With camera equipment I have generally had very bad luck with repairs when I have taken them to a technician, so I have grown to do things myself first, and if I fail, then I can take them to be fixes by someone “qualified”.

Here I shall talk about some photographic technique, equipment use, repair, and a couple of other sidelines which are, in some respect, related to general tinkering.

Tobias

Tobias Feltus:
Share