When we go camping out in the sticks I keep finding myself in awe of the night sky, and I’m drawn to photographing it, like a moth. My Fujifilm XPro2 is exceptional in low light, but I’ve found it almost impossible to get a sharp shot of the moon with a manual 135mm lens, and my swirly starscapes taken with the Fujinon 23/2 are sharp, but swirly.
After seeing Rick Oleson repeatedly taking crisp and detailed pictures of the moon with a variety of lenses, I decided to get a lens to take a picture of the moon. KEH had a Sigma 600/8 catadioptric lens in F mount for a decent price, and I decided to also get an E-P2 since it was dirt cheap, to try a full spectrum conversion. The conversion involves removing the IR filter that sits in front of the sensor (but behind the dust shield). I was planning to buy an IR “heat absorbing filter” from Edmund Scientific for another project, I’m hoping the filter out of the Olympus will work for this, which would make the E-P2 free.
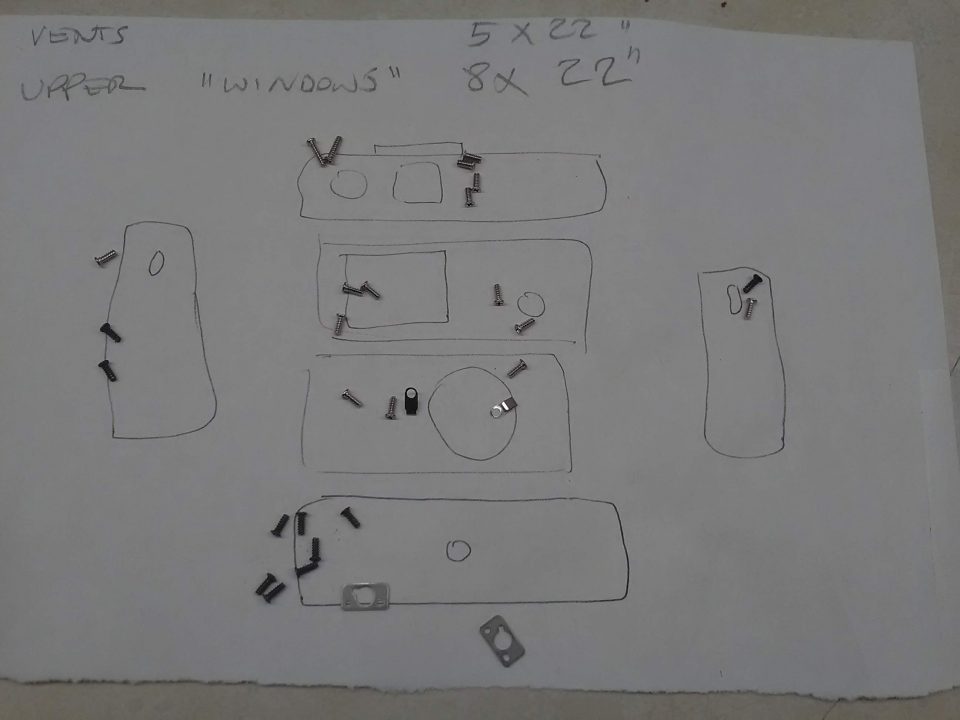
I couldn’t find any teardown images for the E-P2, so I looked through a couple of Olympus conversions here, then got stuck in. I didn’t photograph the whole sequence. It is NOT EASY, and I take no responsability over your actions. Clear a good workspace with good light. Get some tape and paper to draw the 6 sides of the camera roughly, to sort screws.
Disassembly order:
1: Remove base (don’t remove the tripod mount as with the E-P1, it will fall into the sensor assembly), 7 screws.
2: Remove sides (top marks to Olympus for not requiring any adhesive trim to be removed for any of this).
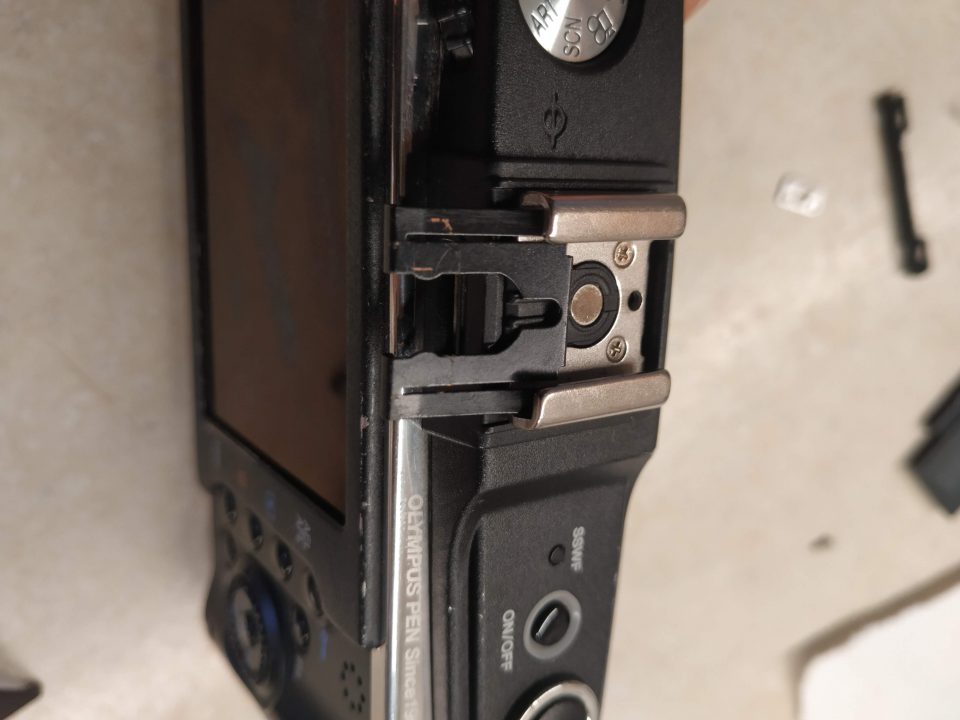
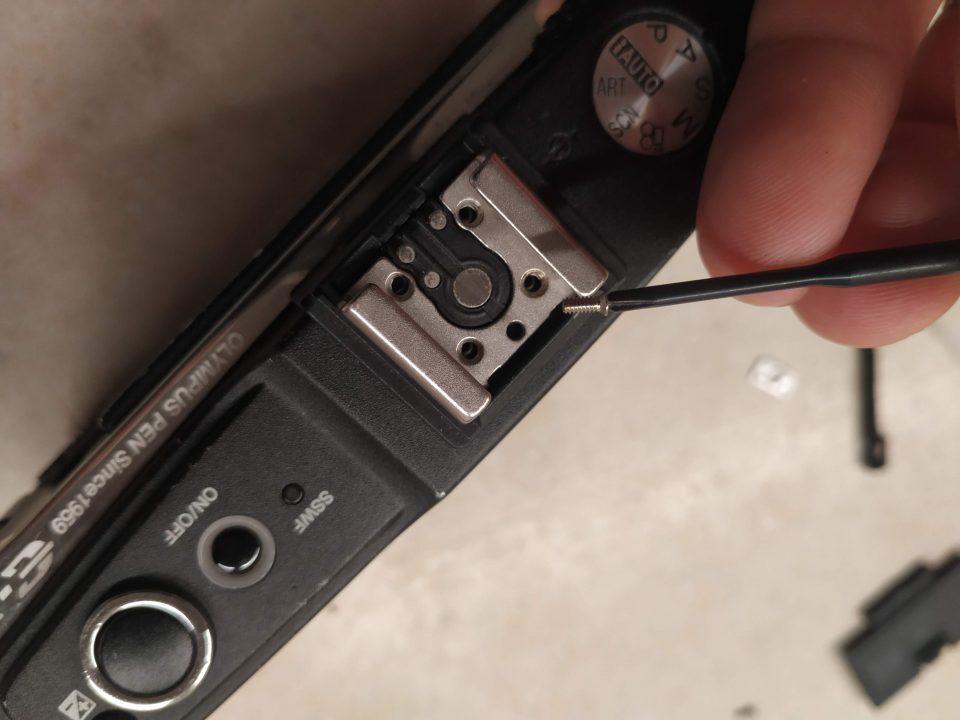
3: Remove hot-shoe then top cover: hot-shoe has a clip covering the screws, this gets lifted from the front of the camera, then it pops out. The 4 hot-shoe screws are the only countersunk screws you will find today. Below the EVF socket you will find the only two longer screws you will see today, set them aside. The top plate is now held in by a couple of screws on tabs that poke through the chrome bezel, two of which have little springs on them.

4: Remove rear/LCD: 4 small screws, then one on the left on what looks like an earth-contact. Lift it up a little, then remove one screw holding the ribbon, flip up its clip and the rear comes away.
5: Remove 4 black screws from just outside the lens flange.
6: Gently remove some black strapping tape from the ribbons behind the sensor.
7: looking at tutorials for other Olympus cameras, I found the need to dissolder the ground to the sensor. Do this now.
8: One of the 4 screws that holds the sensor assembly onto the shutter assembly is hidden under the shutter ribbon. Disconnect the smallest ribbon (timer LED), loosely fold it back around the camera chassis and tape it out of the way. Unclip the other ribbons: most are the “traditional” kind with a black lever on the ribbon side which you can pop up with a finger nail, but the one at the top has a grey clip at the back (opposite the ribbon), very close to a bunch of components on the main board. This one is harder to unclip, be careful. This ribbon will not come out without removing the shutter assembly (held in by those 4 black screws you took out at the front). Gently wiggle the left side of the shutter assembly up: the lens mount needs to fit through the chassis, and you need to be careful of that ribbon you folded back earlier, it has folds in it more or less exactly where this assembly needs to move.
9: Remove the 4 screws which hold the sensor to the shutter: PLEASE be careful (I was not), there may be shim washers under each screw. They are magnetic, so you can loosen the screws and use a magnet to retrieve each stack and label them (colour code with a sharpie works). I didn’t know they were there, and they fell out, no idea where they are meant to go (more on this later).
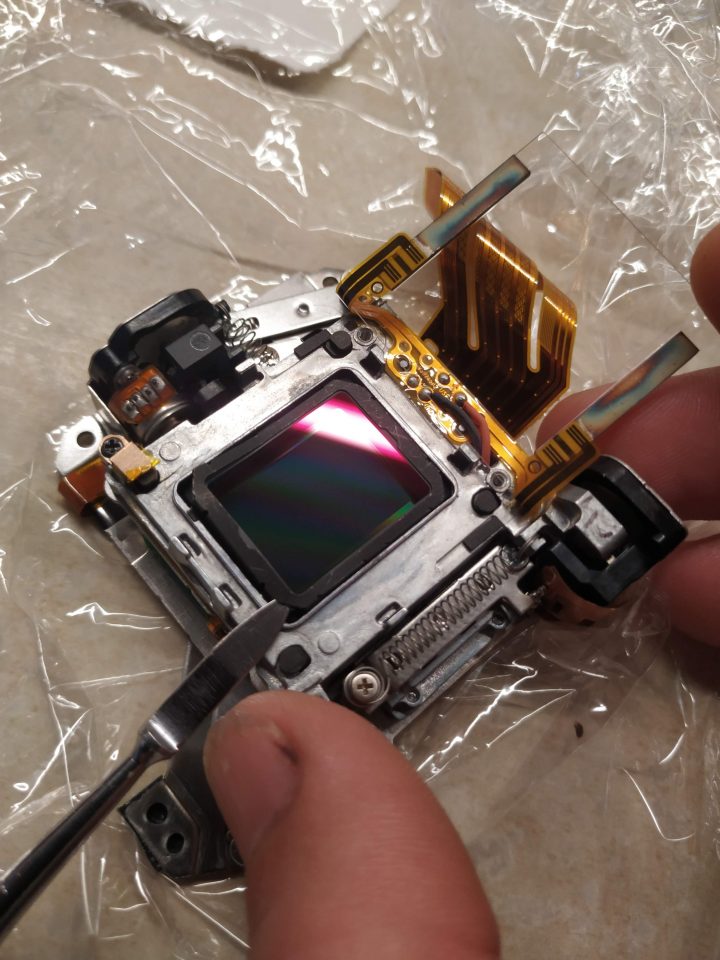
10: 4 screws hold the dust shield onto the sensor assembly, I only removed 3, as you end up putting a lot of pressure on the stabiliser assembly, which I was not keen on. DO NOT TOUCH the inside of this piece of glass. If there is any air movement in the room you are in, try to stop it. Removing these 4(3) screws was the hardest part of the job.
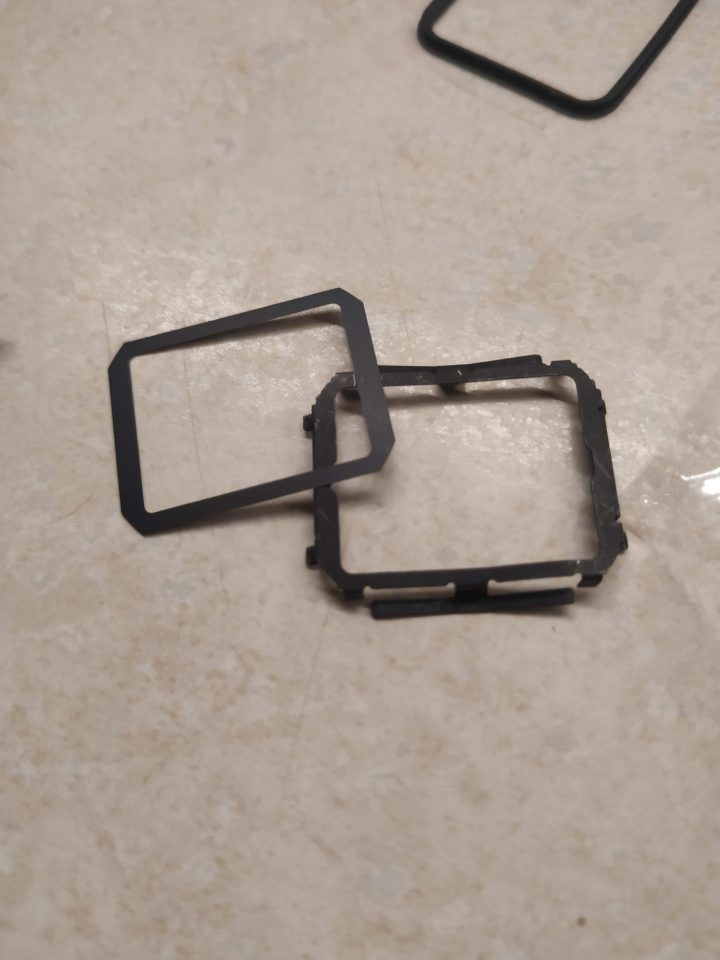
11: Whilst holding the dust shield with one finger, use a tool to prise up on the black spring clip which holds the IR filter in place. It came out without getting too mangled. Once its out, there is a plastic mask, then the IR filter (I wouldnt touch its surfaces, I’d wrap it in a Kimwipe or something delicate). Now, put the dust shield back without getting any dust inside/on the sensor. Check multiple times with a bright light. Make sure the rubber seal is in place, then reverse the process of putting it back together.

NOTES: I tested the camera with just the shutter assembly back in place and the LCD plate attached, to verify the camera worked. I found that I could not reach infinity with a manual lens (and my F-Mount adapter does go past infinity!) so I took it back apart and removed all the sensor shims, which now permits it to go slightly past infinity. This is now due to the fact that the camera is picking up incompatible wavelengths of light. This may not be the case with your camera, but it is worth having a note of the shims regardless. AF seems to work fine with my Panasonic lens.
Though I am not a huge fan of polycarbonate chassis and screws threaded into plastic, the overall design of the camera is pretty robust and impressive. I especially like the fact that no trim needs removed to access screws. It is also worth note that the shutter is a Copal unit, I wonder how many cameras use Copal shutters nowadays? I did find it interesting that there are several motors in a digital camera. The shutter has a motor, the stabiliser has two motors, and I think there was another, though I can’t remember what it does.