I recently delved into a slightly contorted process which seems to be somewhat unchartered territory: 3d scan an object with a mobile phone, 3d print the model in wax, then cast it in silver as jewellery.
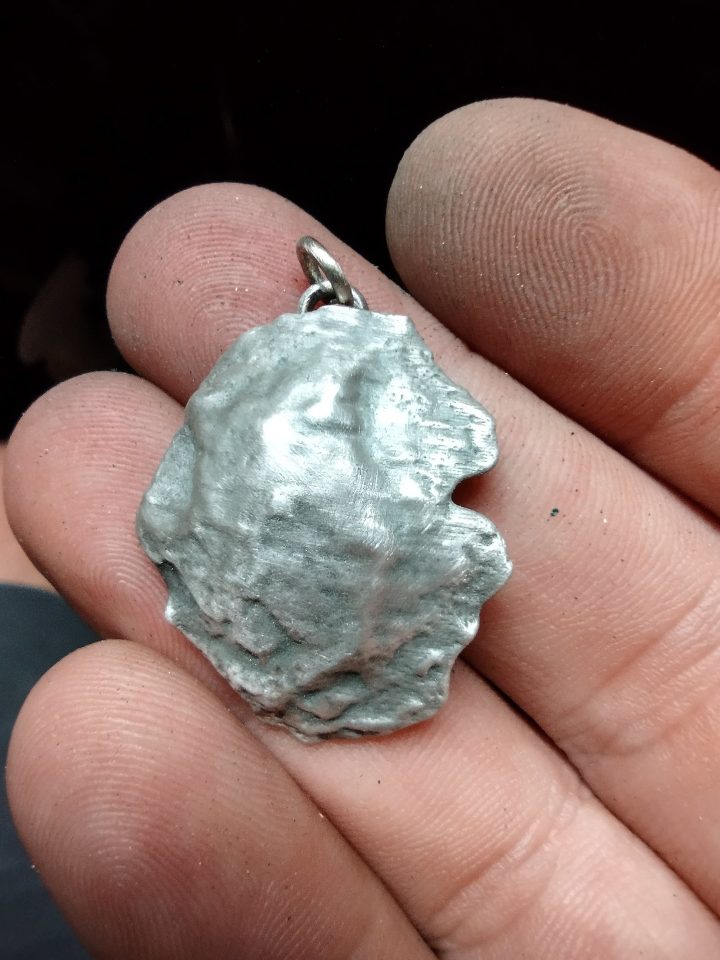
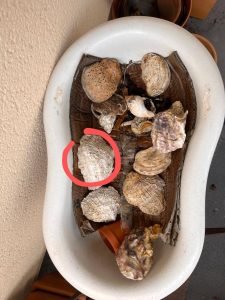
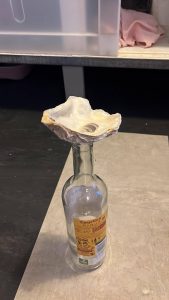
<TLDR> in October Lauren and I passed our tenth year together—something neither of us ever thought could happen, with anyone—so I decided to make her a pendant representing an oyster we ate around the time we got together. We found some Ostrea Edulis off the west-coast of Scotland, and ate them. We also ended up keeping the shells on the balcony, for all these years.
The process of playing with analogue and digital is one that I have been interested in for years, as a photographic tool. I have been shooting analogue photography for over thirty years, and in the last twenty I have been scanning colour, using “digital darkroom” techniques and then printing back to analogue (photochemical) material. So the idea of doing this in a 3rd dimension is not hugely abstract, however the price of the tech to perform the process has only recently been attainable, and my experience is more limited. </TLDR>
Now, this is what I did. Still a bit long, but I wanted to write enough detail that you might be able to skip some of the trial and error.
Scanning: a part of the process which could be optimised. I’m in Arizona, Will (https://wanderson.xyz/) is in Edinburgh with the shells, so he took a number of shots of the shell, as well as trying Scaniverse (https://scaniverse.com/) software. The individual pictures were processed with Meshroom (https://alicevision.org/), and I imported that files directly into Blender as I was unable to understand how the cleanup package worked.

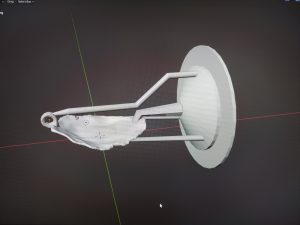
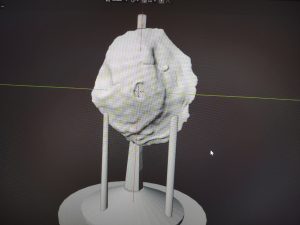
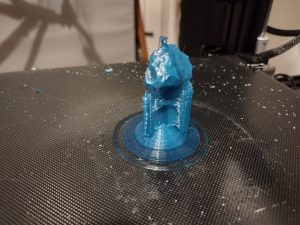
3d model: I used parts of the Scaniverse and parts of the Meshroom mesh, and spent a few days struggling with the file, which had a lot of stray geometry and way too many vertices. This is an issue with my experience and skills, and not pertinent to the process. The things to try and avoid are areas that are too thick, or too thin (this is a weight thing, balanced with areas that won’t print if they are under your minimum wall thickness of the printer), as well as needing to have a clean mesh with no stray geometry, good normals and all the other stuff that is necessary for Cura to be happy. I then added a shallow conical base, designed to fit inside an empty toilet paper tube, a runner and three vents. The eyelet did not print very well, so I added one later.
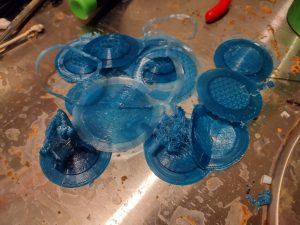
Printing: I have a Voxelab Aquila X1 with a direct feed, and I have been using Cura. The wax I bought is from Machinable Wax (https://machinablewax.com/wax-filament/), as it was the lowest temperature burnout I could find. The wax has a printing temperature range of 140-150c which is lower than the stock firmware on the Aquila will permit, so I installed the Alex firmware (https://github.com/alexqzd/Marlin/releases). Minimum extrusion temps (V1.3.5) are found at Control/Advanced/”Min Extrusion T” , and is a setting that resets to 180c each time the machine boots. I wasted many days trying to print with a 0.2mm nozzle, and kept getting a feed failure. These issues persisted with the 0.4mm as well. I think one of the issues is that I have the stock hot end, but there are many questions I never tried to answer. I contacted Leo (https://www.printsleo3d.com/) and he suggested changing the retraction amount, which may have been the cure, as prints started working.

Here are the Cura settings I used:
Quality
Layer height 0.1
Initial layer height 0.2
Walls
Wall thickness 1.2
Wall ordering: outside to inside
Alternate extra wall: yes
Print thin walls: yes
Z seam alignment: random
Top/Bottom
Top surface skin layers: 0
top/bottom thickness: 1.2
Top/bottom pattern: concentric
Infill
Infill density: 18%
Infill pattern: Triangles
Material
Printing temp 150c
Printing temp initial layer 155c
Final printing temp 135c
Build plate temp 80c
Build plate temp initial layer 90c
Flow 100%
Skirt/brim flow 110%
Initial layer flow 110%
Speed
Print speed 20mm/s
Infill speed 20mm
Wall speed 10mm
Inner wall speed 7.5mm
Travel speed 75mm
Initial layer speed 10mm
skirt/brim speed 10mm
Enable jerk control: yes
Jerk settings 20mm (30mm for travel)
Travel
Enable retraction: yes
Retract at layer change: yes
Retraction distance 1mm
Retraction speed 45mm
Retraction extra prime 0
Combing mode: not in skin
Avoid printed parts when traveling: yes
Cooling
Fan speed 80%
Initial fan speed 0%
Regular fan speed at layer 2
Support
Structure: normal
Placement: everywhere
Pattern: concentric
Overhang angle: 45
Wall line count 2
Density 15%

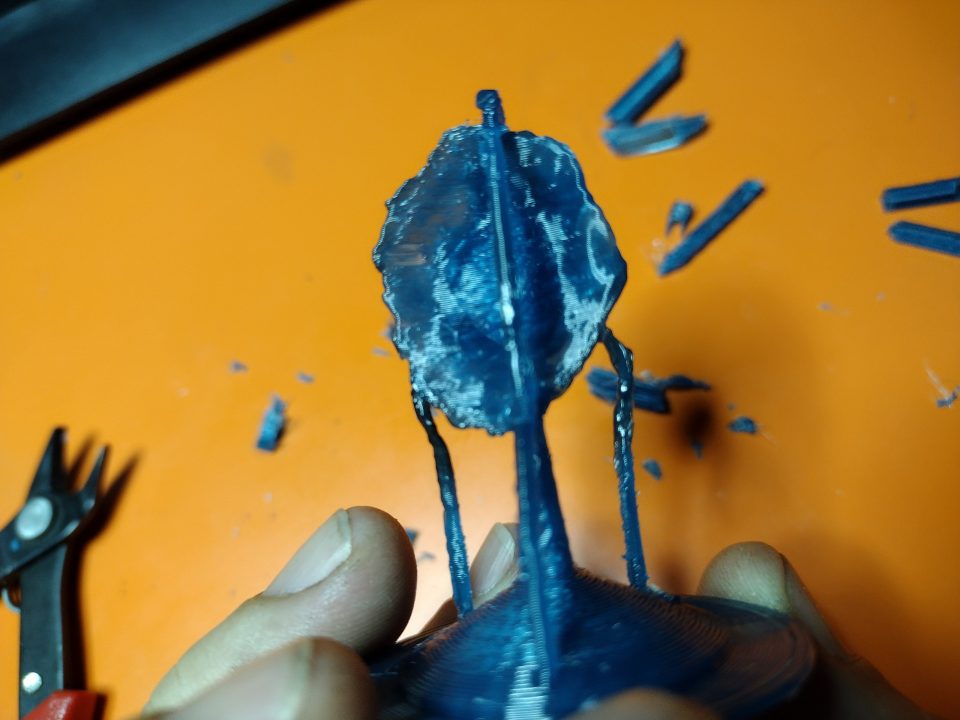
Lost wax: this is the part I am familiar with, though my familiarity is buried in my past. First, clean up your wax cast. I did this with a blade and flush cutters. The wax is flexible enough that it didn’t break. I bought a tub of DAP plaster of Paris, I went for the cheapest one I could get. I put the wax into the base of an empty toilet paper tube, added some packing tape for fun, and mixed up plaster.
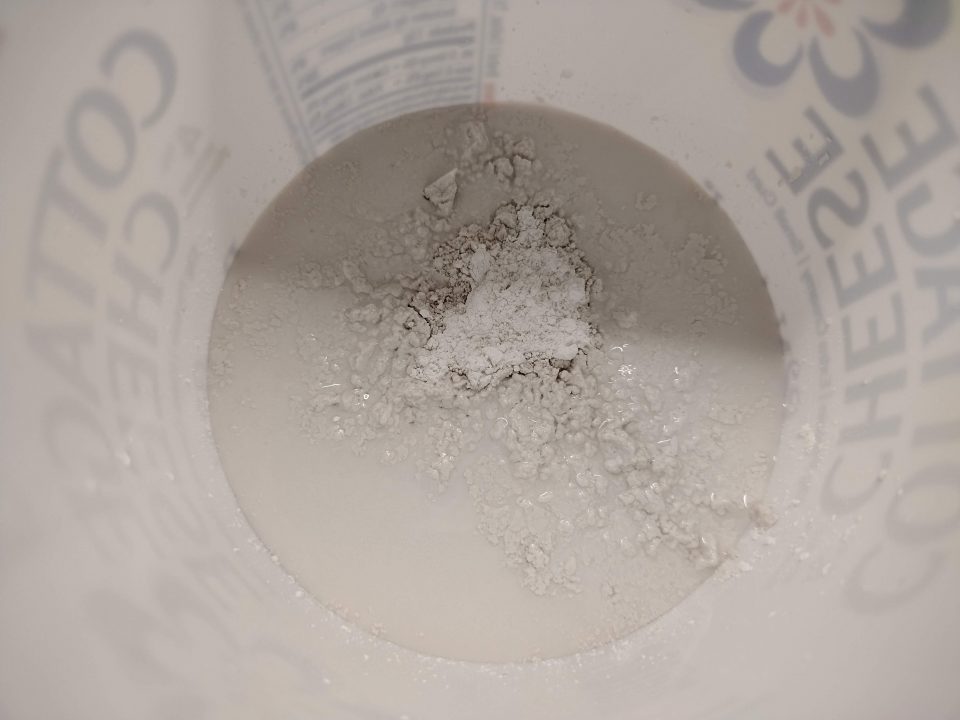
Note on mixing plaster for a mold: I watched a few youtube videos on lost wax casting and saw a lot of weird plaster mixing techniques which go against what I was taught. At college I dabbled in jewellery, glass and ceramics, and plaster mixing was the same in the three departments. Your main objective is to get a thin batter consistency with no air bubbles, so you don’t want to use an eggbeater, or even a spoon. This is what I recommend: guess or calculate the volume of plaster you will need, and measure that out in cold tap water, put that in a mixing tub (in my case, an empty yoghurt tub). Start sprinkling or sifting plaster onto the water, it will sink. DO NOT MIX IT. as you get close to saturation, you will get small dry islands (see below): wait a few seconds as the first islands will sink, add a little more until you have small islands that stay on the surface. You now have the correct amount of plaster in your mixture. Now use your hand, slowly, to mix the plaster and break up any clumps. You can use a glove, and you can wear a dust mask, but the hazards are pretty low, especially if you are not doing this on a daily basis.
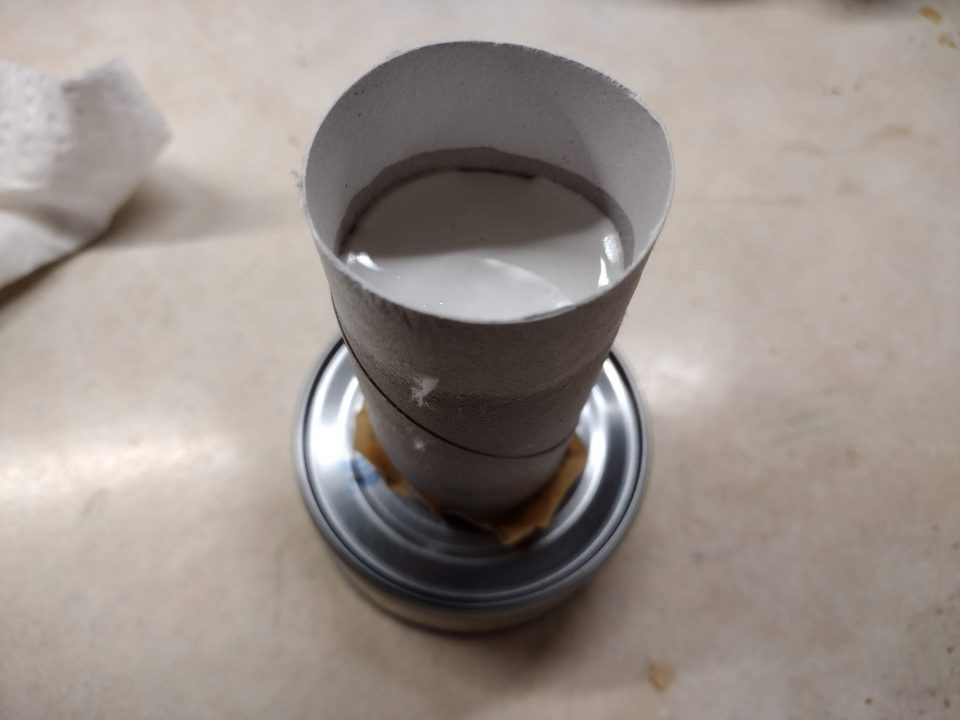
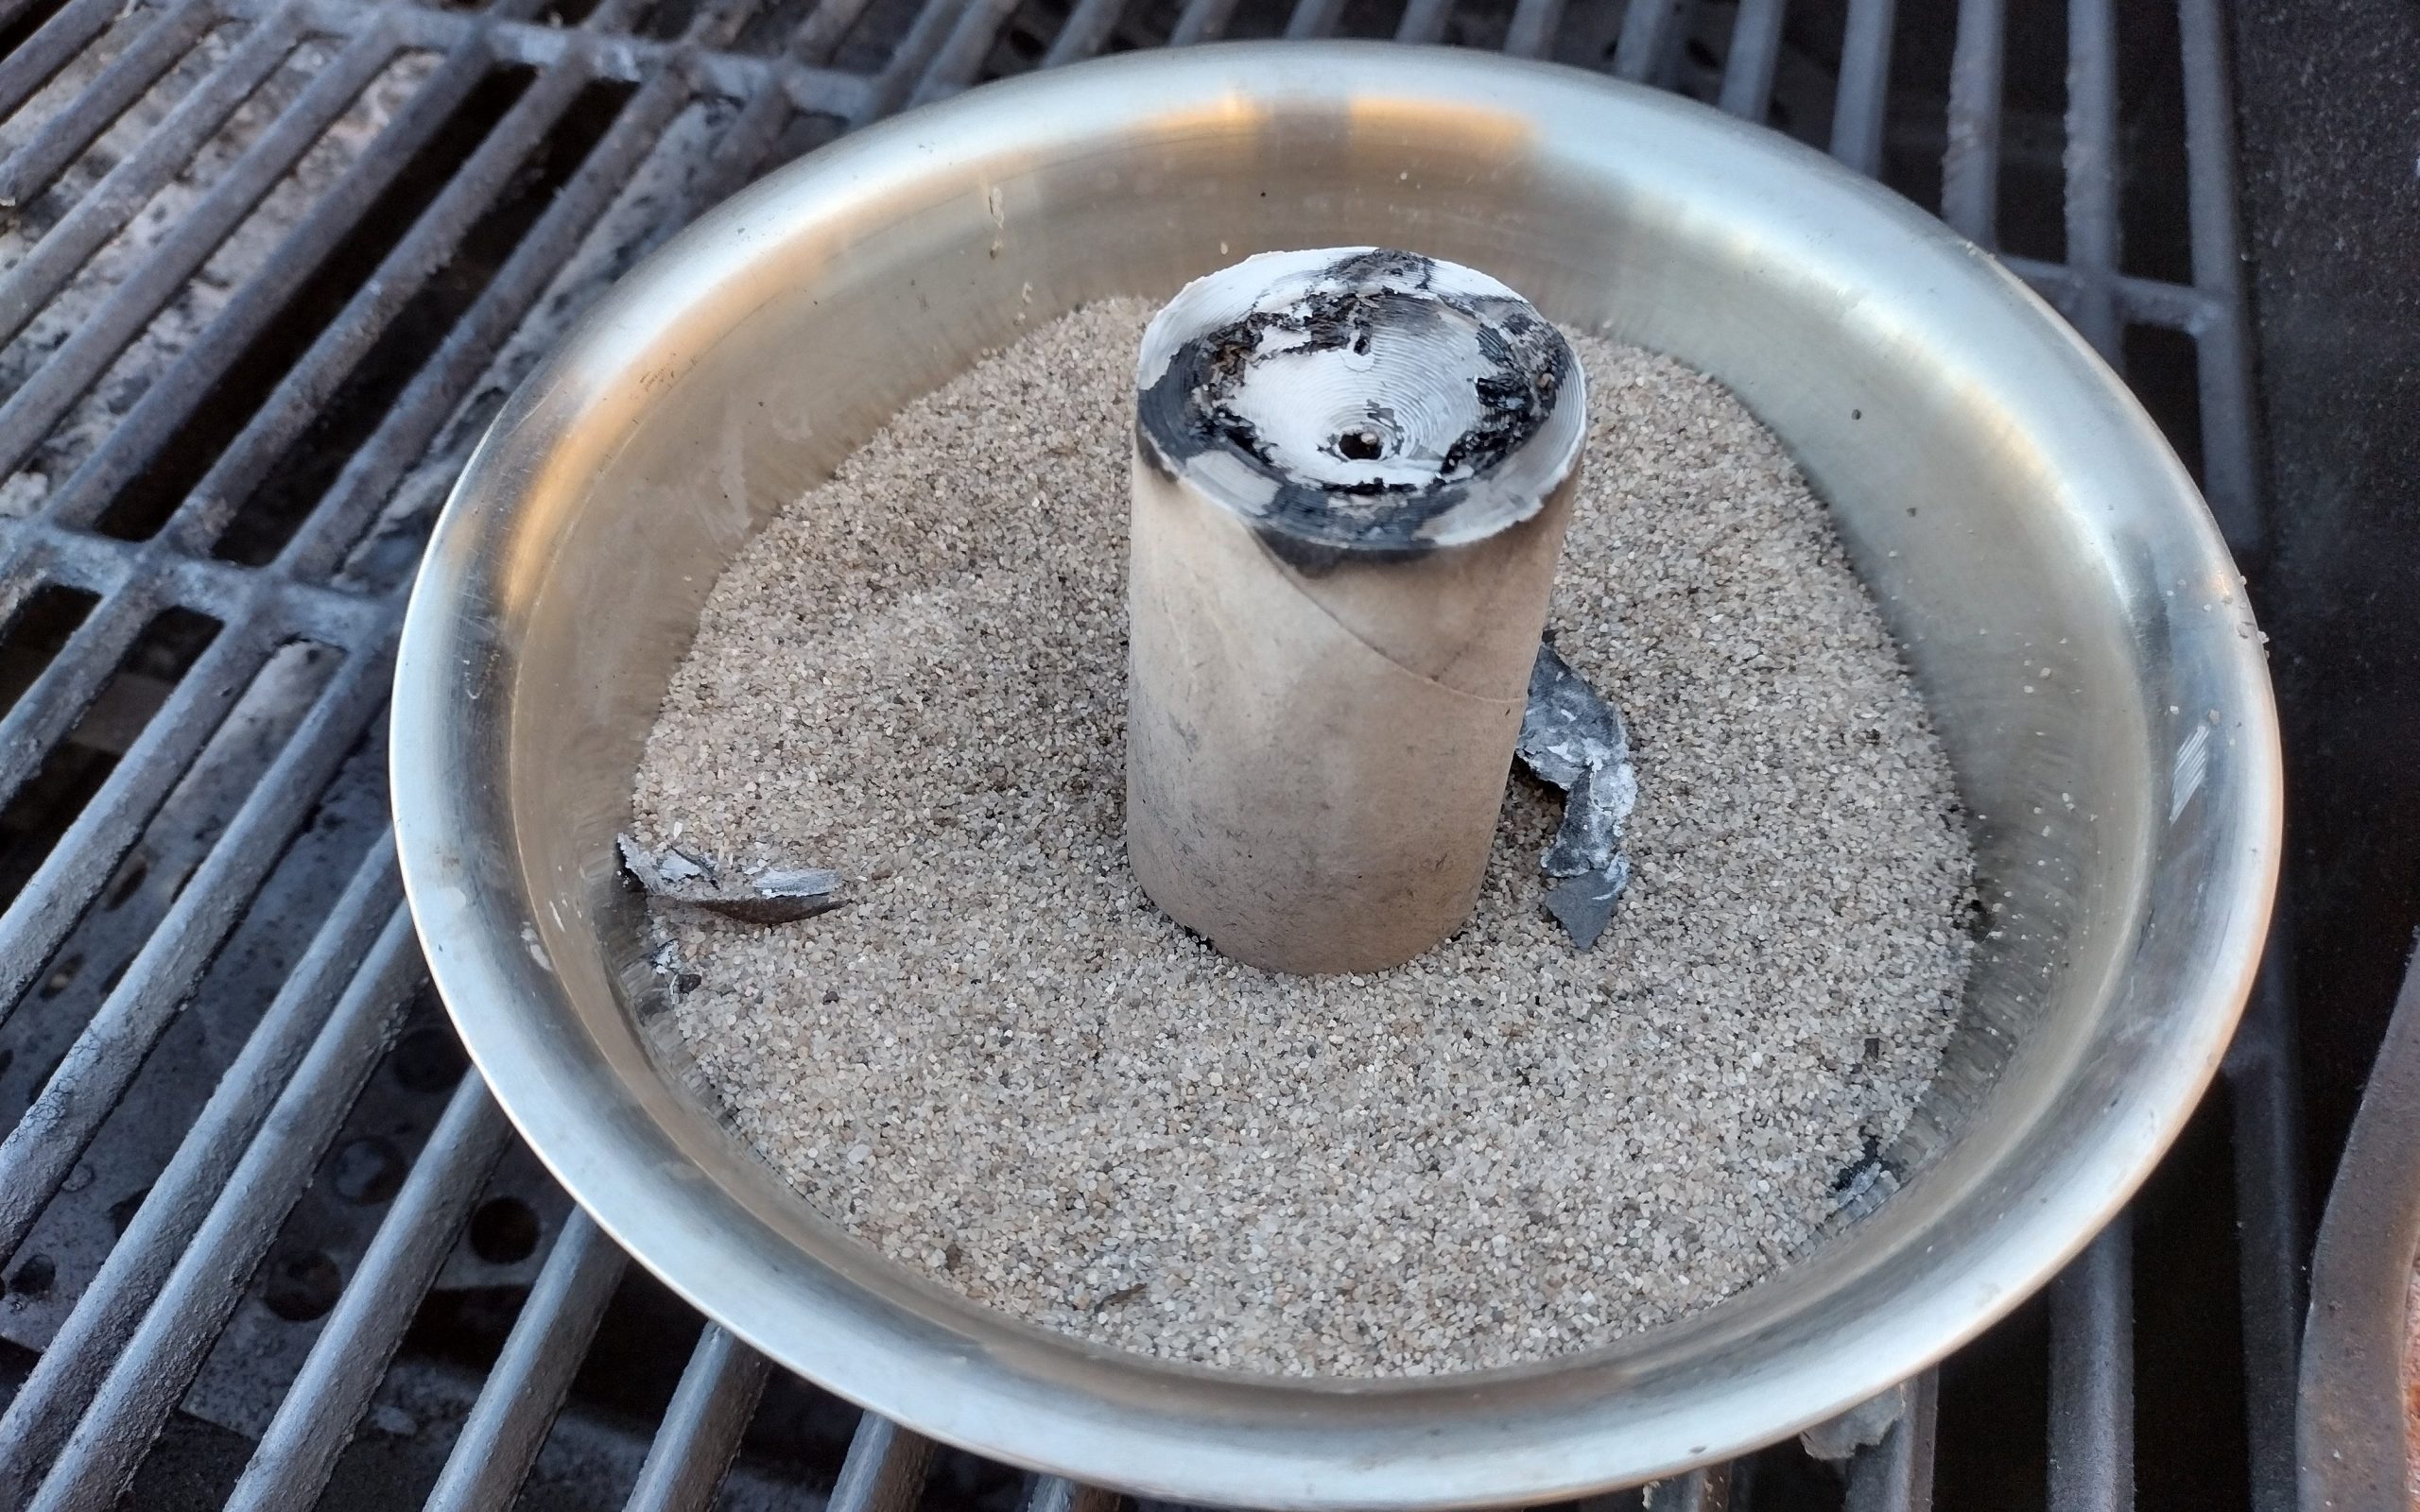
When you feel that the mixture is pretty smooth, go ahead and pour it into your mould: pour slowly, as far away from the object you are casting as possible. You want it to pour as a slow steady stream, no splats, no splashes. Your goal is to avoid any air bubbles. Fill the mould, it doesn’t matter if you have loads of mould material, you really just need enough to maintain thermal mass when casting. If you are using an absorbent mould, like the toilet roll tube, then it will absorb a little water and cause a dip in the level as it cures, this is ok. Plaster takes a while to cure, it is exothermic, so it will warm to the touch, and once it starts to cool down, you can start drying the mould. I put the mould in the oven (wax side down, on an empty tuna tin) at 300c. This started to melt the wax, but was not sufficient, so I took it outside and put it in the gas grill, and left it burning for a couple of hours. Once the wax had burned out, I turned the mould over and put it in a container of sand, and left it in the grill to heat up. This is to help keep some heat in the mould so it doesn’t chill the casting too quickly.
Casting: this is not hard, but if you haven’t done it, maybe hit Youtube for a bit. Most of Youtube suggests you need vacuum machines and spinning things to cast a small object, but this is not gospel, my casting came out fine, using a toilet roll and a gas grill. I have a MAPP gas torch, and I bought a porcelain crucible from eBay, along with the springloaded handle and a bag of borax. You need to “prime” the crucible with borax, watch a couple of videos on this. Basically, you heat the porcelain, take the heat off, sprinkle a little borax, then melt it to create a glaze. Keep it thin.
Keep it safe: wear full length clothing, eye protection and use leather gloves. I used channel-lock style pliers to pick up the mould when it was hot, so have something on hand.
Guestimate the amount of metal you will need, put it in the crucible, sprinkle some borax on it, then heat it up with fire. Once it has puddled, keep the heat on it a little bit longer than you think you need to, then pour it quick/steady into the runner in your mould. Wait a couple of minutes, then pick up the mould, and drop it in some cold water. The heat shock will destroy the structure of the plaster, and it should break away with your fingers.
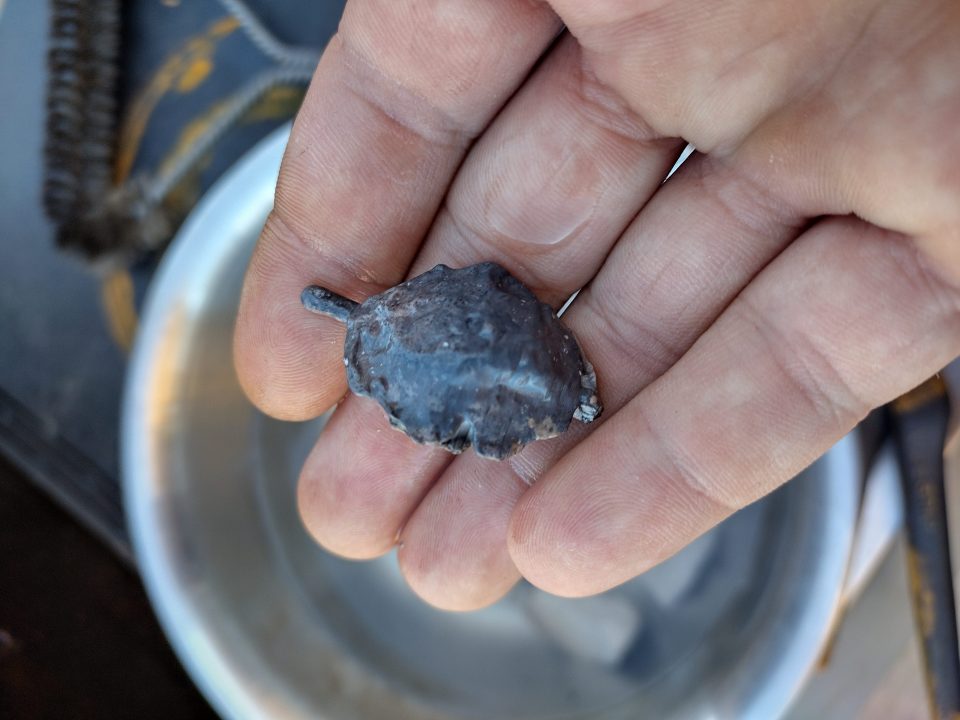
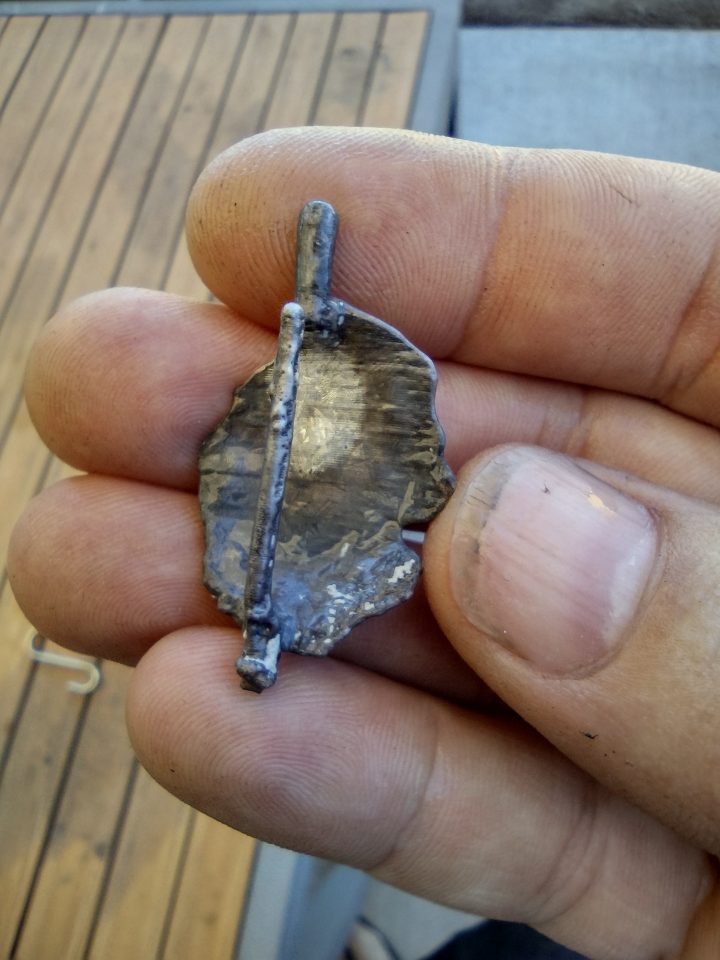

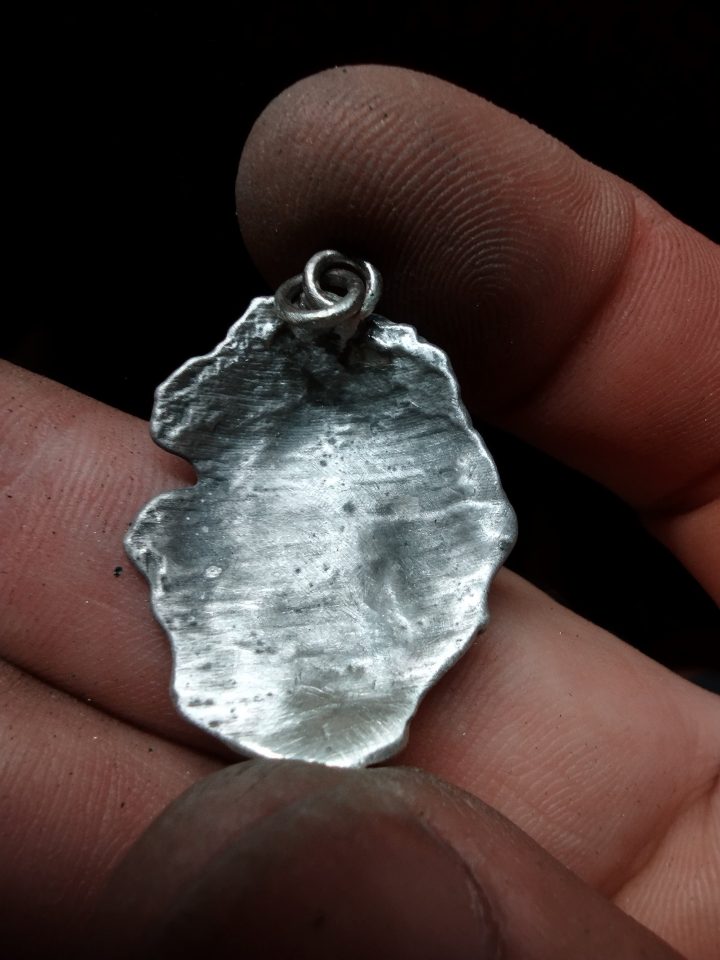
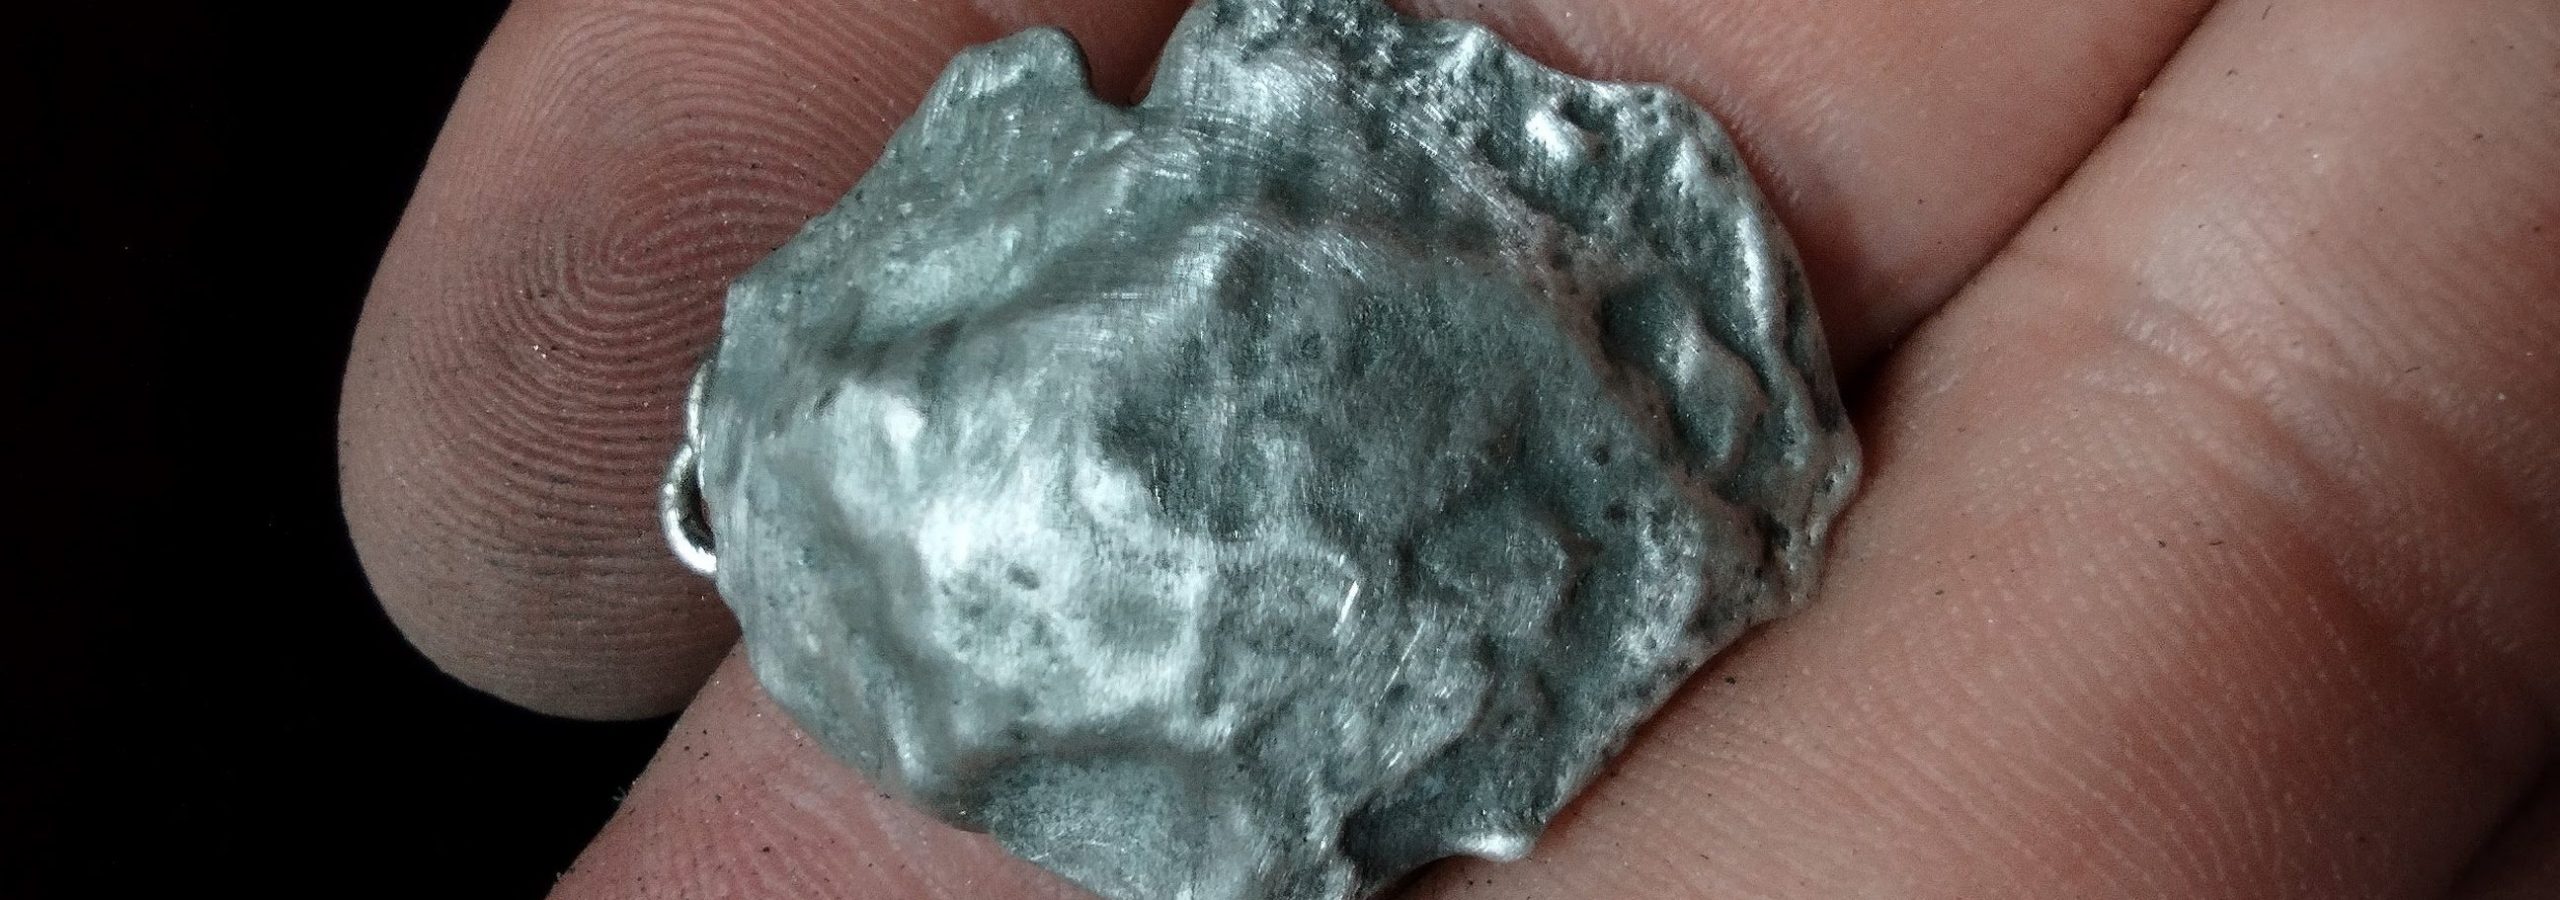
Finishing: I bought a piercing saw, and some small files. I attached an eyelet ring made from silver wire using silver solder. Silver solder comes in soft, medium, hard and extra hard, which is a temperature rating: hard takes more heat, so you always start with hard and work backwards, allowing yourself to attach things together without the heat undoing your previous work. You can make flux by mixing borax with water, and covering the area you are trying to solder with this. Try to hold your pieces in place, this is the hardest part of the process. I ended up finishing the pendant with a piece of Scotchbrite, as it brought up the highlights and kept some of the patina from the cast.